
Few things are more frustrating to customers than searching through endless product lists for what they want. It costs them time, and it may cost you money. A frustrated customer will likely leave your website and go elsewhere, meaning you’ve lost a potential sale.
Fortunately, solving these issues is a straightforward process if you add product filters to your WooCommerce store. In this article, we’ll discuss why product filters are essential, and show you how to create them. Let’s get to work!
What Is a Product Filter?
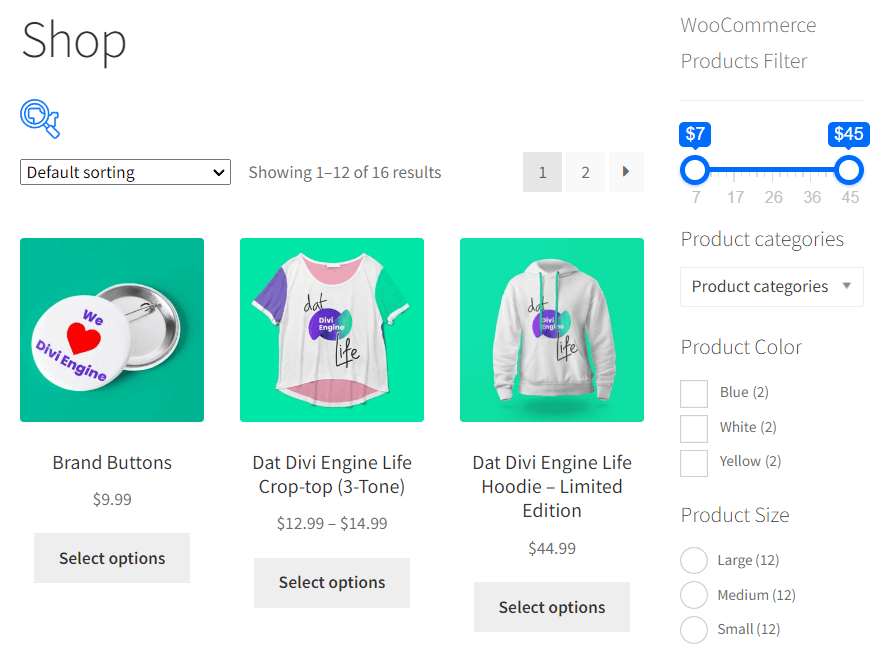
A product filter allows an e-commerce customer to precisely refine their search. All products consist of “attributes” and “values.” Attributes are the physical characteristics (such as color), and values are the variations on those attributes (such as black or white).
Many e-commerce stores have filters that allow customers to search for items with specific attributes and values. Attributes can include price, color, size and many other descriptors. The values they can choose from will depend on what you sell and your stock.
As an example, here is a search on Amazon for “book”:


You can see options in the left-hand menu to filter the books based on their genre, reviews, series, release date and more. This feature makes the shopping experience much easier and quicker for customers.
Why Product Filters Are Important For Your WooCommerce Site
Making your WooCommerce site easy to use is essential to retaining customers. Despite this, many e-commerce stores neglect effective product filtering. This means that if you implement filters well on your website, you’ll have a competitive advantage over many of your rivals.
However, the benefits of adding product filters to your WooCommerce store don’t end there. Let’s look at some of the other advantages:
- Improved user experience. Adding product filters helps customers find what they need quickly, improving their experience on your site. Providing a strong UX can improve your reputation and bring in positive reviews and word-of-mouth marketing.
- Increased range of products. Filtering allows you to expand your inventory without creating confusion for your customers. This means product filters are especially important for e-commerce websites with many products.
- More sales. Directing customers to what they want quickly can increase conversions.
- An SEO boost. Product filters can boost your SEO if implemented correctly. In turn, an optimized site can drive traffic and increase sales.
However, it’s worth noting that using too many product filters can hinder your site’s SEO by making it appear that you have a lot of duplicate content. Fortunately, there are some best practices you can follow to avoid this problem.
How to Add Product Filters to Your WooCommerce Store (In 4 Steps)
Now that you understand a little more about product filters, you may be wondering how you can properly implement them on your website. Let’s take a look at how to do this in just four steps. Note that we’re assuming you already have a WooCommerce store set up and full of products.
Step 1: Install and Activate WOOF Products Filter for WooCommerce
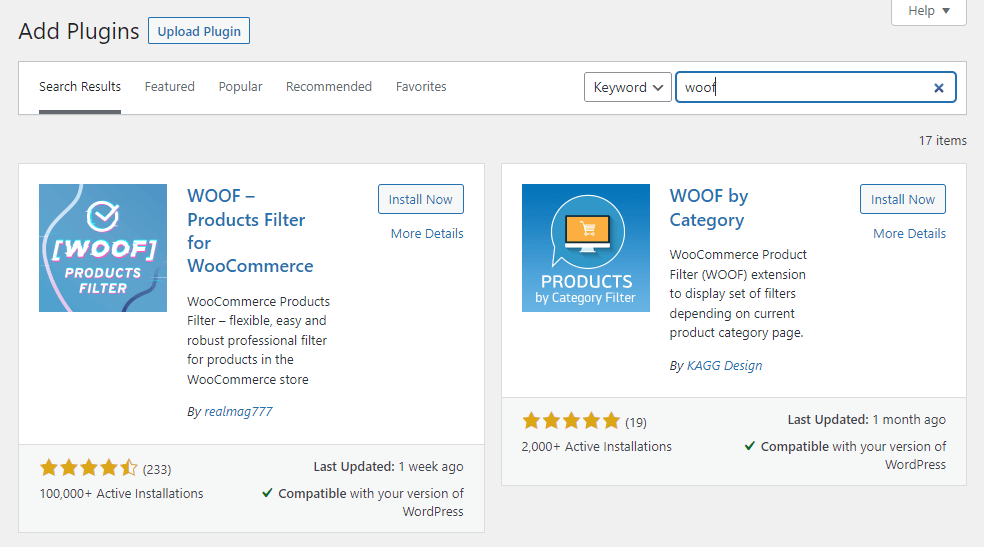
Since WooCommerce doesn’t offer filtering functionality by default, you’ll need a plugin to add this feature to your store. There are a few options, but we’d recommend WooCommerce Products Filter (WOOF):

This is a product search plugin that allows customers to filter items by categories, attributes, product tags, products, custom taxonomies, and price. WOOF filters can be displayed either using a widget or shortcode.
There are two versions of the plugin available: free and premium. The paid version offers some additional features, including the option to search by color, a hierarchy drop-down, statistics, SKU, and a taxonomy slider.
For now, we’ll stick with the free version. To install WOOF, head to the Plugins section of your website and select Add New. Search for “WOOF” and install it:
Then hit Activate, and you’ll see that a new tab is added to WooCommerce’s settings: Products Filter.
Step 2: Edit Your New Product Filters
If you go to the new tab, you’ll see several sub-tabs as well. Right now, we’ll stay in the Structure tab:
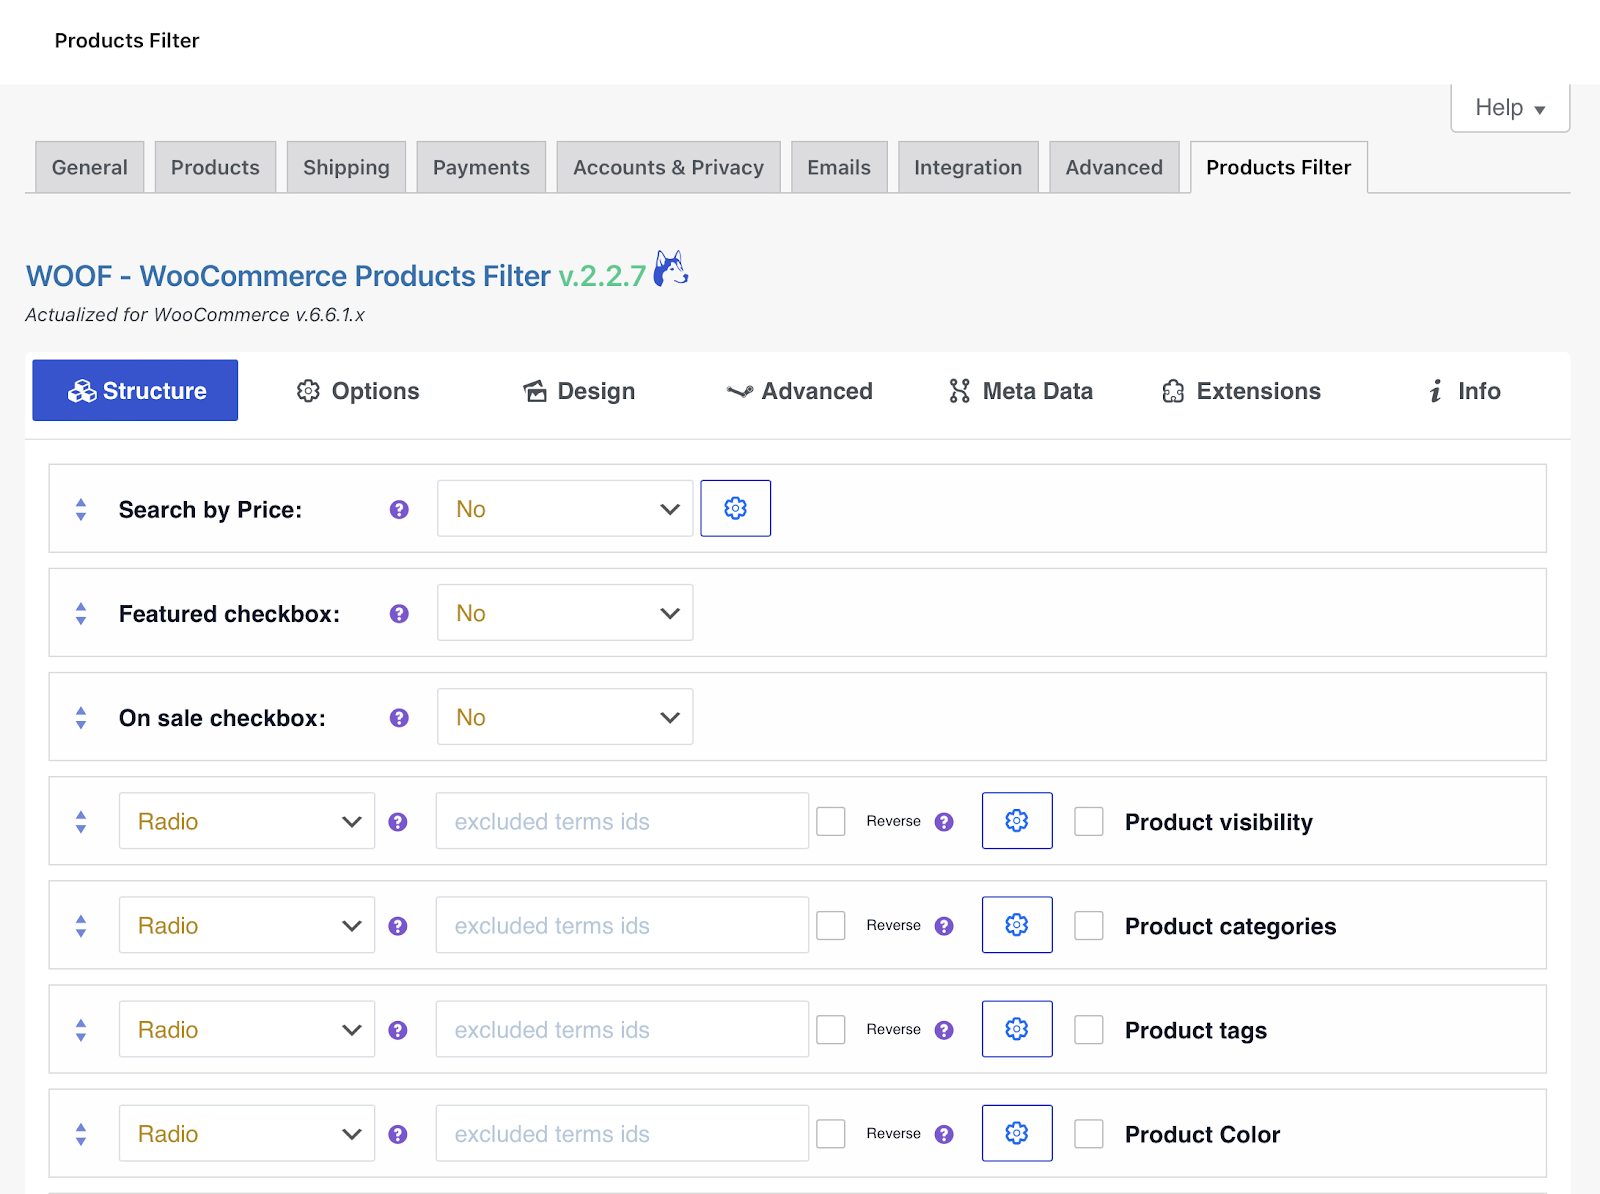
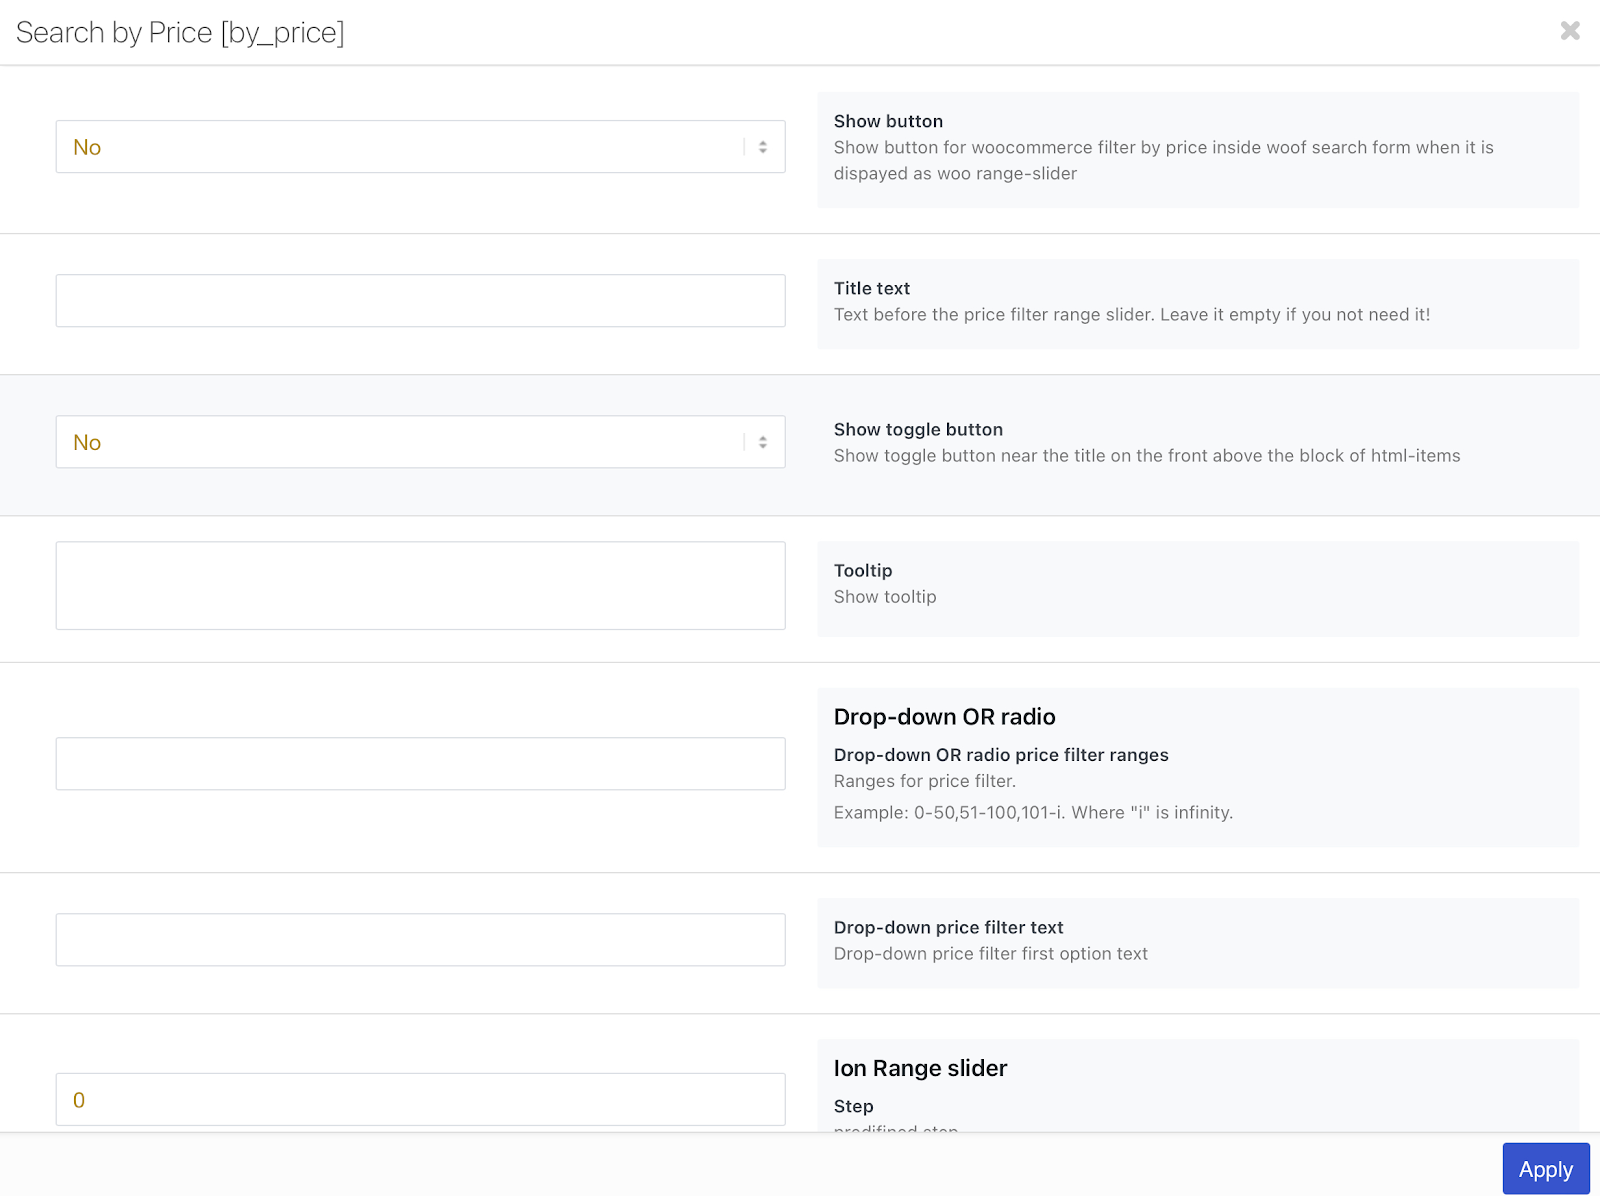
Here you’ll see three options: Search by price, Featured checkbox, and On sale checkbox. In the first field, you can determine how you’ll present the Search by price filter, with options including a slider, a drop-down menu, and text input. The following two options allow you to let customers include or exclude featured and sale products.
Below, you’ll see a list of the other filters that are available, such as product size and product tags. You can activate or deactivate each one by selecting the corresponding checkbox. For the ones you include, the drop-down menu allows you to decide how you’ll present them. There is also a field for excluding specific terms and/or product IDs from the filter.
Finally, clicking on the cog icon next to a filter will open a product visibility window that allows you to customize it further. For example, you can decide whether to show a title label and configure how the results of a filtered search are displayed:
Finally, back on the main page you can use the arrow buttons on the left to reorder the filters. It’s a good idea to place the most important options at the top.
Step 3: Customize Your Filters Through Options
Now that you’ve set up your filters, you can explore further customization settings in the Options tab:

While we won’t go through them all, here are a few of the most important options to check out:
- Set filter automatically: Automatically applies the filter for the customer.
- Autosubmit: Starts a search after the customer changes any element, not when they click on the search button.
- Show count: Displays the number of items within the taxonomy.
- Hide empty terms: Will not show the filter if there are no items to display.
- Try to ajaxify the shop: Will attempt to present the search in AJAX. AJAX sends and retrieves data asynchronously, which means it won’t interfere with the existing store page’s display.
- Hide WOOF top panel buttons: The red buttons at the top of your store’s page will not be shown.
Moving along, the Design tab allows you to alter what the product filters will look like. There are many different skins available in three subsections: “flat,” “minimal,” and “square.” It’s a good idea to try as many of these as possible to find the one that best suits your theme and branding:
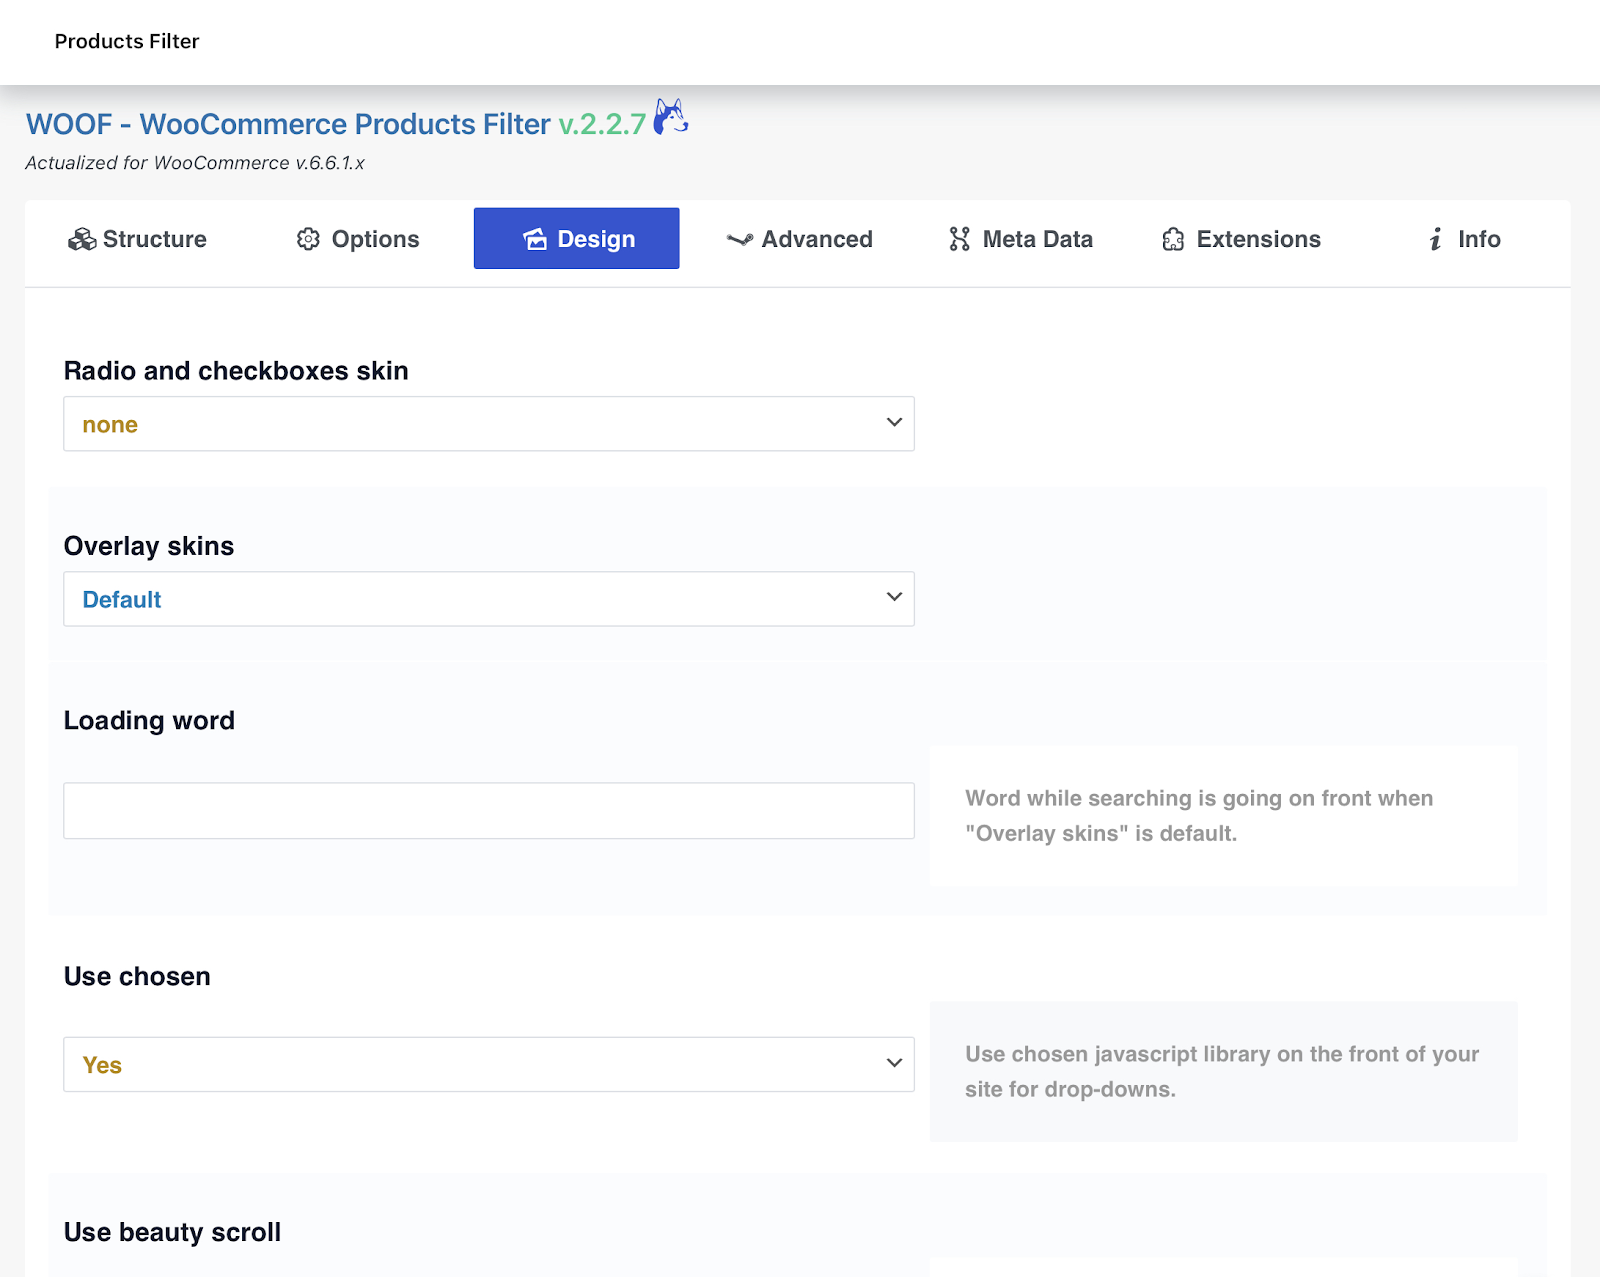
This section offers plenty of other options, including the ability to add tooltips. You can also upload your own images for the various filter buttons, allowing you to bring the new feature more in line with your existing theme.
Step 4: Display the Product Filters on Your Website
Once you’re done customizing your product filters, it’s time to make them available to customers. There are two ways to do that.
The simplest option is to use the dedicated widget. To do this, open up the widget editor (Appearance > Widgets). Choose the option to add a new widget, and search for “products filter”:

This will let you place your customized filters in any widget area on your site. It’s best to locate this widget near the top of your sidebar, so that it’s easily visible:
If you want to place your filters in a non-widget area, or simply would like more control over their placement, you can use shortcodes instead. The developers provide detailed instructions for how to create and use these shortcodes.
Conclusion
Allowing visitors to use product filters in your online store is a win-win proposition. By directing the customer to exactly what they’re looking for, you can create a better shopping experience and increase the time they spend on your website. This, in turn, can lead to an increase in sales.
Do you have any questions about adding product filters to your online store? Let us know in the comments section below!
Image credit: 200degrees.