
If you own or collect rare items that you’d like to sell, auctioning them off online is a great way to get the job done. However, when you use a well-known marketplace you’ll likely have to pay steep fees. It can be much more cost-effective to cut out the middleman and create your own auction website.
In this post, we’ll discuss the benefits of selling your products on auction websites. Then we’ll show you how to build your own auction site with WordPress in just six steps. Let’s get to it!
The Benefits of Creating an Auction Website
If you’re an aspiring seller of rare, vintage, or collectors items, you may still be deciding whether to create your own auction site or opt for a popular marketplace. So let’s start by discussing the benefits of selling independently.
Firstly (and perhaps most importantly), you’ll be able to maximize your profits when you sell on your own website. That’s because most popular auction marketplaces have steep fees for sellers.
On eBay, for example, you’ll lose around 13% of each sale to the platform (in most categories). On top of that, you’ll have to pay a flat fee per order. Plus, if you sell more than 250 items per month, you’ll pay another fee for each additional listing.
If you plan to sell luxury items, these fees can be significant. Alternatively, if you plan to auction a lot of small items (such as collectable knick knacks), the numbers can add up quickly. In either scenario, building your own website gives you full control over the process, and can save you a lot of money in the long term.
Furthermore, if you create an auction site within a particular niche, you can also build a community around it. This can enable you to further grow your business and your brand, along with bringing new customers your way.
If your auction website gains traction, you could add premium membership features, such as online courses or an exclusive forum. You might even build a complementary blog and monetize it using affiliate marketing.
Finally, if you use WordPress to build your auction website, the process is both affordable and beginner-friendly. That means pretty much anyone can do it!
How to Create an Auction Website with WordPress (6 Steps)
Now that you understand the benefits of creating an auction website, here’s how you can make one with WordPress in six steps.
Step 1: Choose a Web Hosting Provider and Domain Name
The first step is to choose a web hosting provider. This type of company provides you with the server space and resources you’ll need to launch and maintain your site.
Some web hosts also double as domain registrars, so you should be able to purchase a domain name at the same place. Your domain is essentially your website’s address (i.e., myauctionwebsite.com).
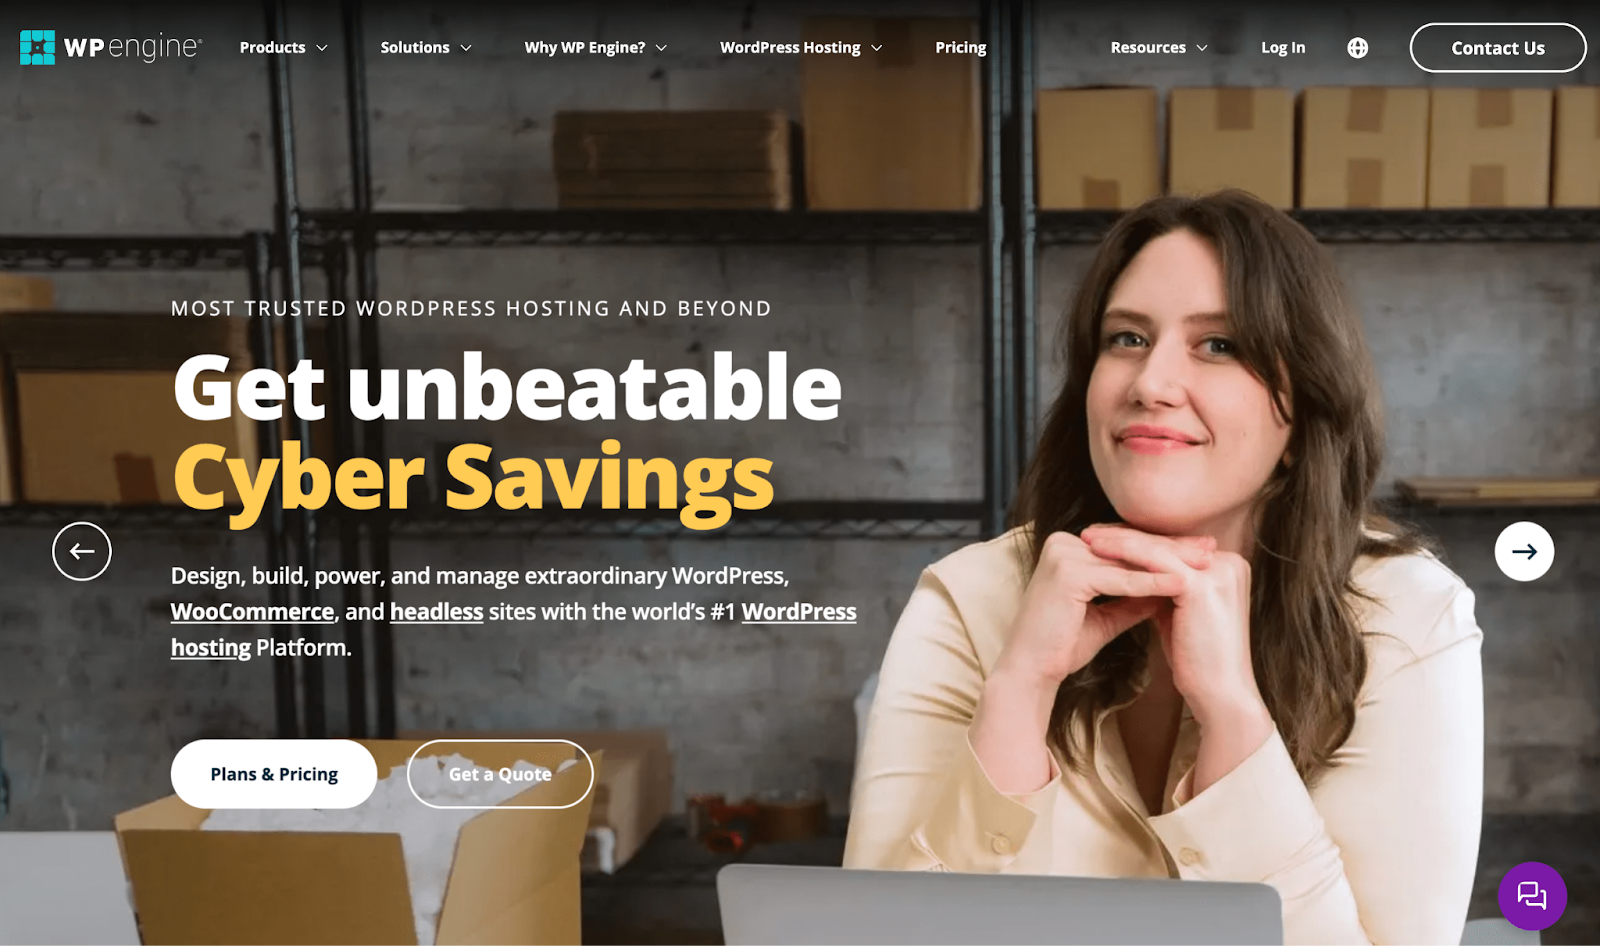
If you’re not sure how to choose a web host, you can consider a popular e-commerce provider. Alternatively, if you’re a beginner or simply want some extra support, you might opt for managed WordPress hosting such as WP Engine:

When it’s time to choose a domain, it’s best to pick something that’s relevant to the type of products you’re selling. You may want to do some keyword research first, to see what potential customers are searching for.
For instance, if you plan to auction off rare pocket watches, you might choose something like “buyrarepocketwatches.com” or “luxurypocketwatchauction.com.” You’ll just need to verify that the domain is available first, which your hosting provider should be able to help with.
Step 2: Install WordPress and Choose Your Theme
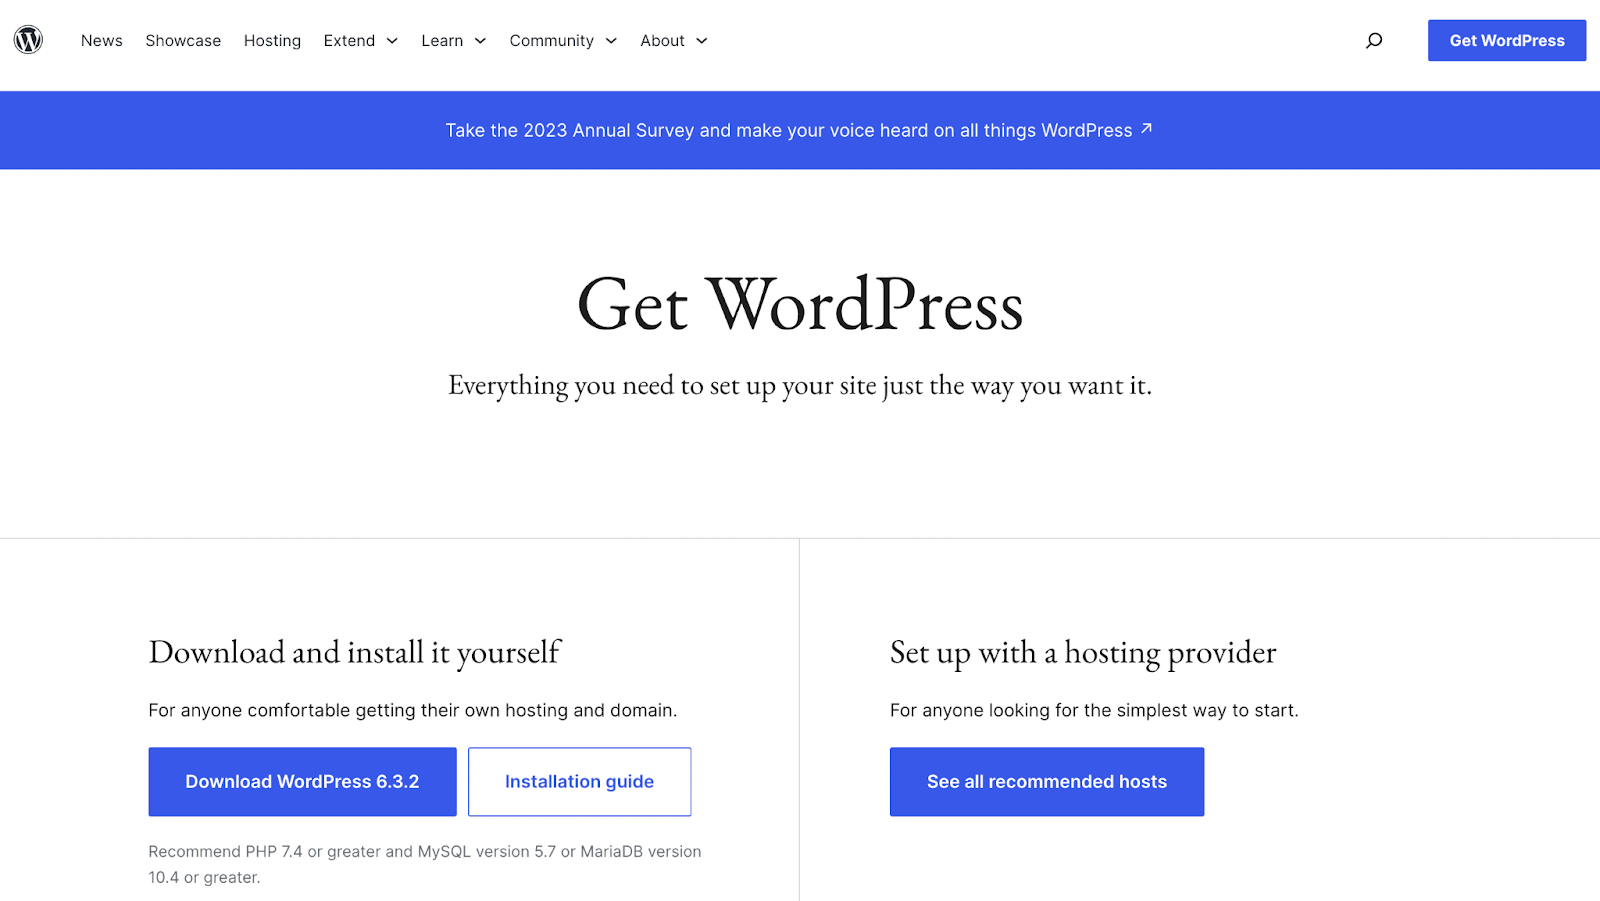
After you’ve signed up for a web host and picked a domain name, you’ll need to install WordPress. Some hosting providers will do this for you, but if not, you can complete the process manually in just a few minutes.
Once that’s done, you’ll want to choose a WordPress theme, which will determine the look and feel of your site. In your WordPress dashboard, go to Appearance > Themes and use the filters and categories to find a theme that suits your needs. Then simply install and activate it.
Step 3: Set Up Your Woo Store
Now you’re ready to transform your site into an e-commerce hub using Woo (formerly known as WooCommerce):

In your WordPress dashboard, go to Plugins > Add New and use the search feature to look for “WooCommerce.”
After you install and activate the plugin, you can follow the setup wizard to walk through the main steps of creating your store. For instance, you’ll be able to add products, set up payment gateways, and more.
At this point, it’s also a good idea to optimize your product pages. This way, it will be easier to create auctions later on.
Step 4: Install the Ultimate Auction for WooCommerce Plugin
Next, you’ll need a tool that can turn your online store into a full-featured auction platform. To do that, you can use a free plugin like Ultimate Auction for WooCommerce:
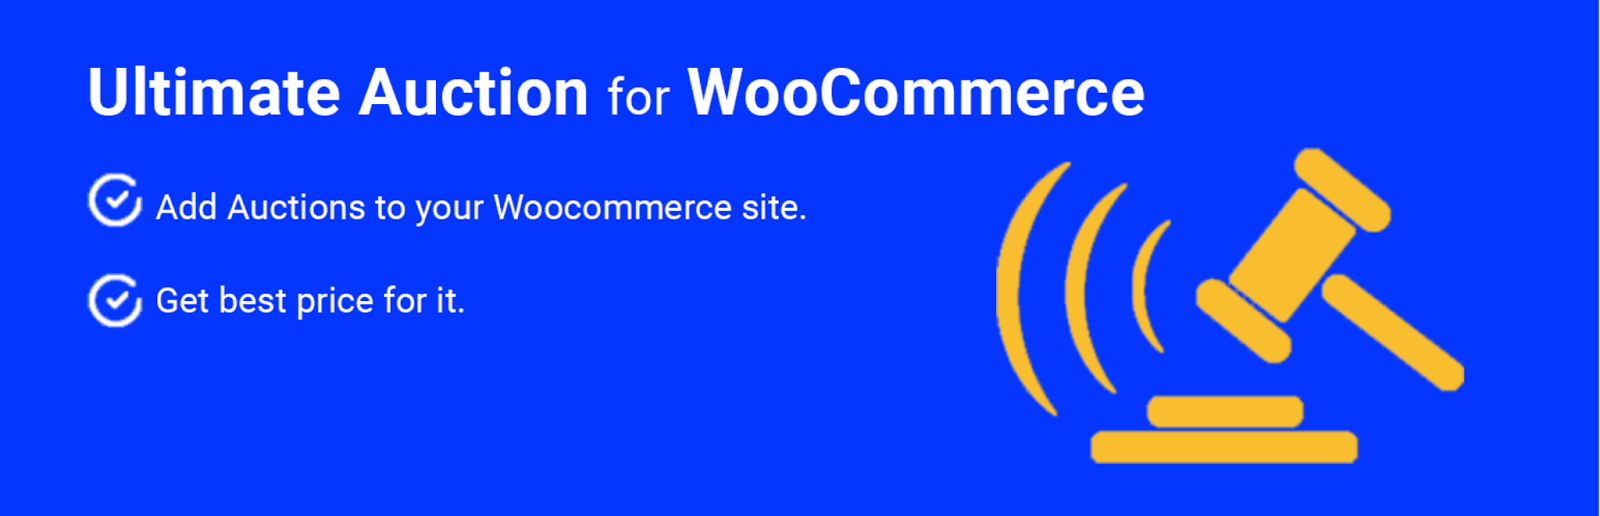
Once again, simply navigate to your WordPress dashboard and go to Plugins > Add New. Search for the plugin, then install and activate it. (Note that there are two very similar plugins with similar banners, so go by the name and not the picture.)
After you’ve installed the tool, go to Auctions > Settings to configure its options. There, you’ll be able to set bidding restrictions, decide where auctions will be displayed, and more.
Step 5: Create Auction Items
Now that your website and tools are set up, you’re ready to create your auction items. To do this, go to Products > All Products in your WordPress dashboard.
Then, find the product you’d like to set up an auction for. Hover over it, and click on Edit. Once you’re on the editor screen, go to the Product data section. In the drop-down menu, select Auction product instead of Simple product:
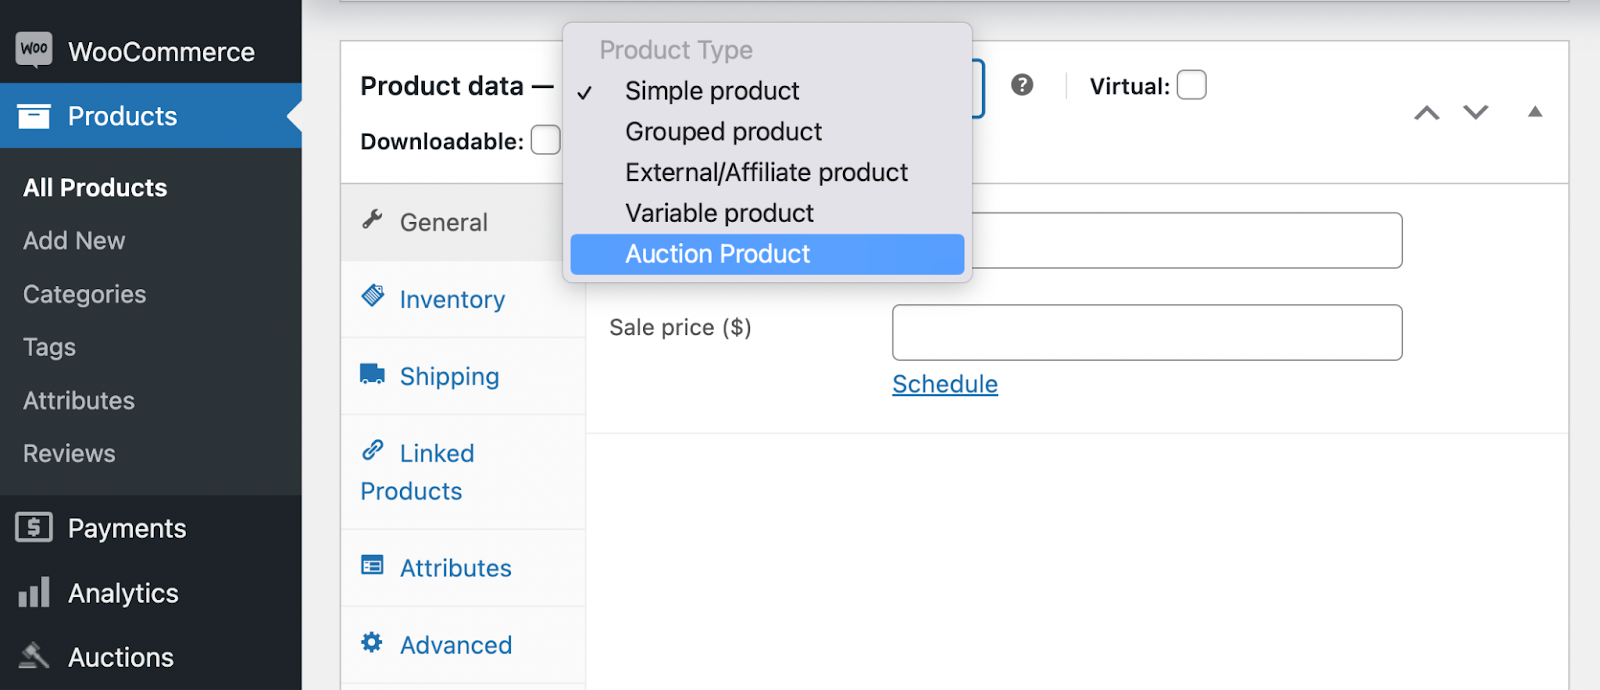
This will open your auction settings for the item. There, you can specify whether the item is new or used, establish an opening price, set the bid increments, and much more.
When you’re happy with your selections, hit Update to save your changes. You can repeat this process for all the other items you want to auction.
Once you have some active auctions, you can check their status and manage them by going to Auctions > Auctions in your dashboard.
Step 6: Optimize and Market Your Auction Website
As we mentioned, there are plenty of benefits to creating an auction website with WordPress instead of using a marketplace. However, one downside is that it will be a little harder to attract your audience.
But don’t worry. As long as you optimize and market your website, you can still run a successful auction business. First and foremost, you’ll want to prioritize Search Engine Optimization (SEO). This way, people will be able to find your site when they enter relevant keywords into Google.
Additionally, you might also consider Pay-Per-Click (PPC) marketing or paid search advertising. Investing a bit in marketing your auction website can be particularly helpful when you’re just getting started, especially if you don’t have a pre-existing following.
If you want to further build your brand and your business, you could also try establishing a social media presence. To do that, you can start by researching the available platforms to find out what’s most popular with your target audience.
Conclusion
If you have an eye for rare goods, auctioning them off can be an excellent way to make money. Better yet, you can maximize your profits by building your own auction website with WordPress. After you’ve set up your online store, just install an auction plugin and add your goods. Then you can optimize your pages, and start marketing your business to potential buyers.
Do you have any questions about creating an auction website with WordPress? Let us know in the comments section below!
Image by Mohamed Hassan from Pixabay