

If you run an e-commerce site, a WordPress Instagram feed can freshen up your content, reach new audiences, and build brand recognition. However, without coding skills, you might not know how to embed a feed on your page. Fortunately, with WordPress, you can use a plugin to do this for you.
In this post, we’ll take a closer look at the benefits of embedding an Instagram feed on your e-commerce site. Then, we’ll show you how to do it in four easy steps. Let’s get started!
The Benefits of Embedding an Instagram Feed On Your E-Commerce Website
Before we show you how to create a WordPress Instagram feed, let’s go over the benefits of doing so.
Instagram has over 2 billion monthly active users, so it can provide a huge audience to promote your products and grow your business. Additionally, implementing a feed on your site is a great way to gain more followers on the platform since your best customers may not know that you have an account.
Meanwhile, an Instagram feed can keep your website looking fresh and up-to-date. Without a social feed, you’ll have to manually edit existing content or create new posts and pages to make sure your site evolves. Therefore, it’s a quick way to keep your site engaging.
What’s more, while you can display your own Instagram feed, you’re also able to embed feeds that you’re tagged in. This can act as social proof on your site which can help increase trust with customers and result in more conversions and sales.
How to Create a WordPress Instagram Feed (4 Steps)
Now that you know why an Instagram feed can benefit your business, let’s take a look at four simple steps to create a WordPress Instagram feed.
Step 1: Install the Smash Balloon Social Photo Feed Plugin
The first step to create a WordPress Instagram feed is to install a handy plugin. You’ll find plenty of Instagram feed plugins, but the Smash Balloon Social Photo Feed plugin makes an excellent option.
With this tool, you can display your Instagram photos across multiple feeds (or in separate ones):


Better yet, the feed is completely customizable so you can make sure it blends in nicely with the rest of your branding.
The free version of the plugin is plenty powerful and enables you to set up an Instagram feed on your website. However, if you want to display tagged posts, access multiple layouts, and display likes and comments, you’ll need Instagram Feed Pro.
To get started, head to Plugins > Add New in your WordPress dashboard. Enter the plugin name in the search bar. Once you locate the tool, click on Install Now > Activate.
You can then launch the setup wizard. You’ll first be prompted to connect to your Instagram account:
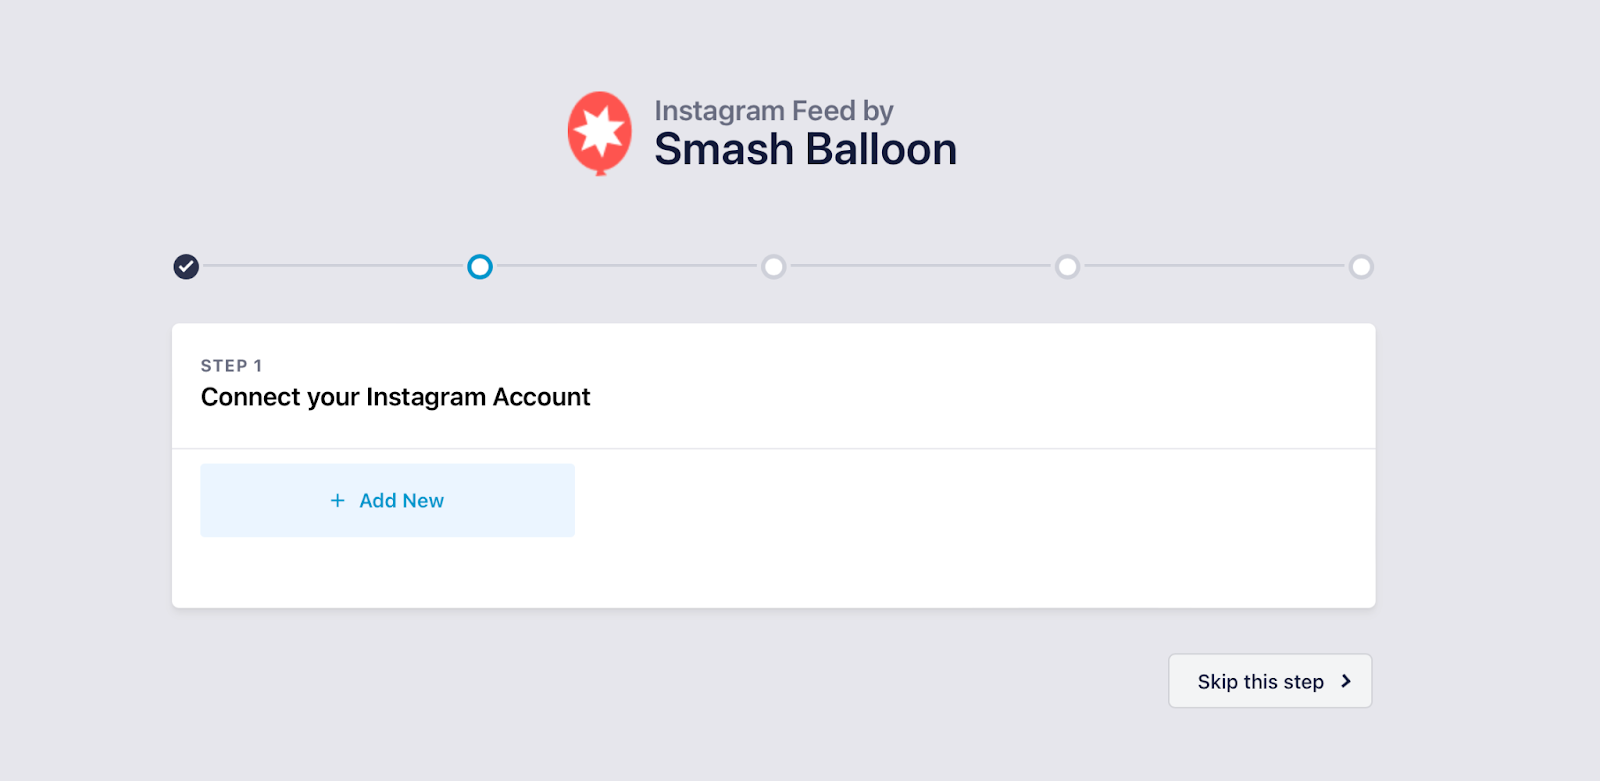
You can skip this step and configure the settings later. Or, if you proceed, you’ll be redirected to the Smash Balloon website to connect to your account.
Here, choose whether you’re connecting to a business or personal account. Then, select your account and confirm the domain. You should see the account appear in the setup wizard:
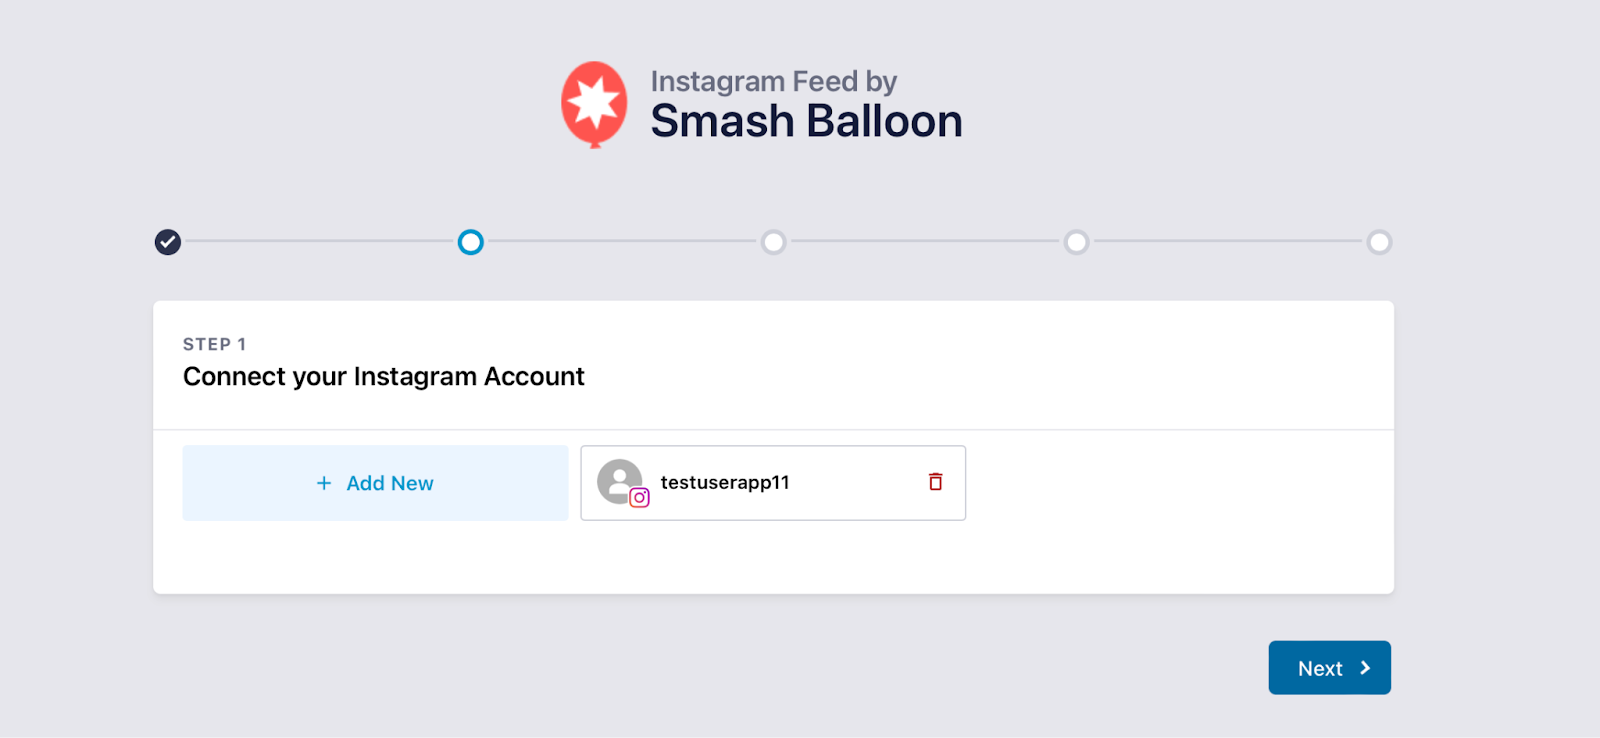
Now, use the toggles to decide which features you want to import. At the very least, you’ll need the Instagram User Feed for the purpose of this article. Finish up the procedure and return to your WordPress dashboard for the next step.
Step 2: Create an Instagram Feed
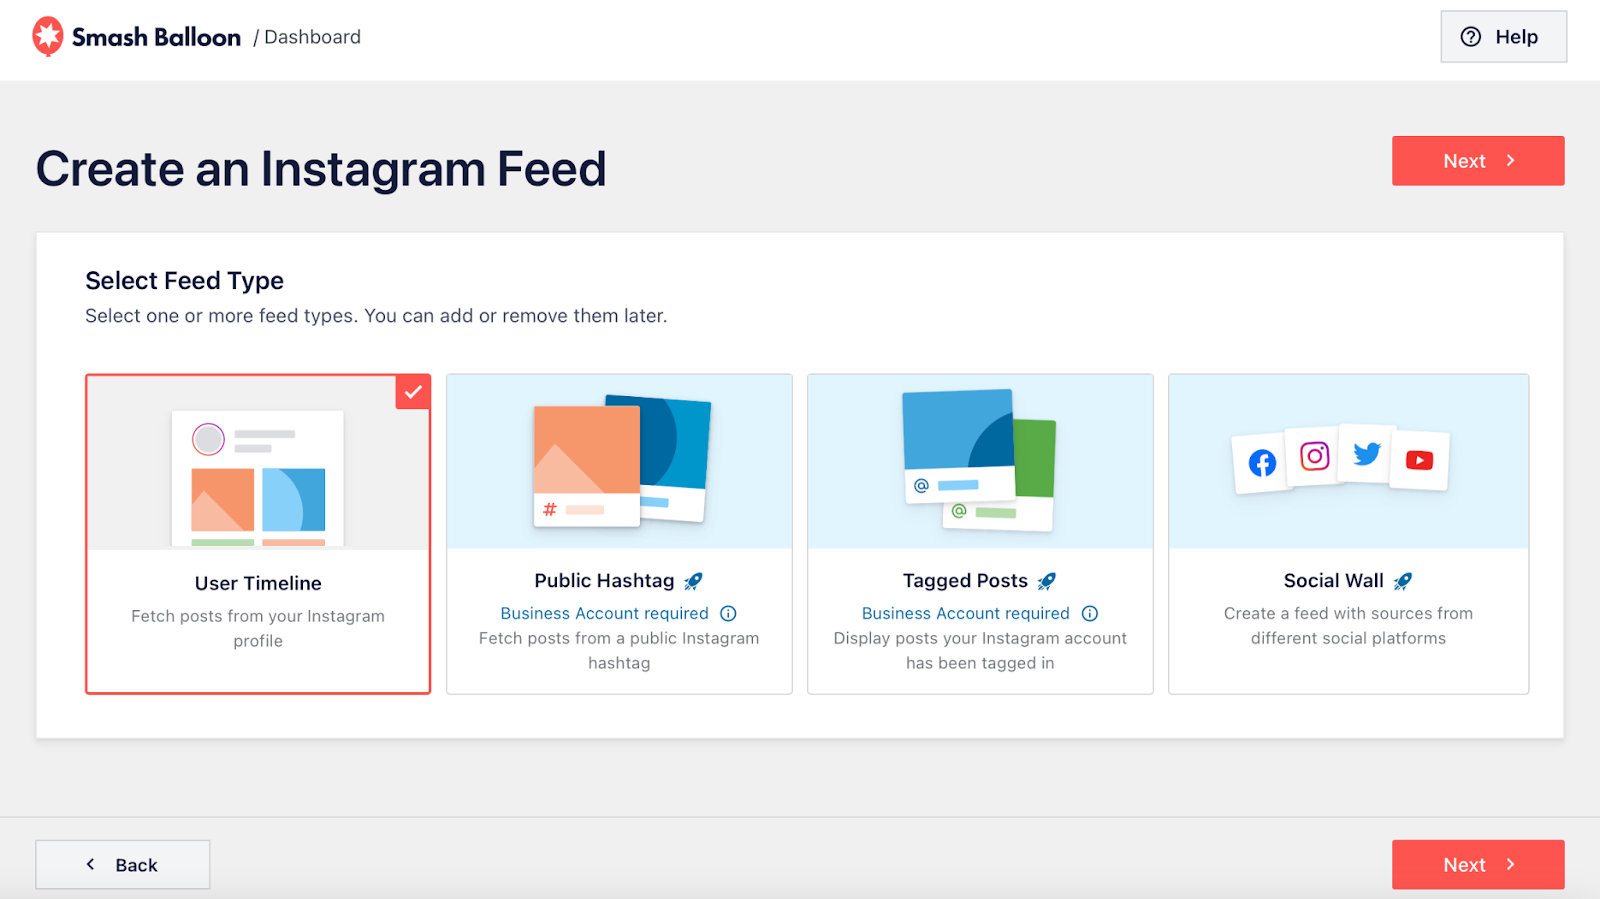
Now that you’ve set up the plugin, you’re ready to create a WordPress Instagram feed. To get started, head to the Instagram Feed tab in your WordPress sidebar. Then, click on Add New:

First, you’ll need to select your feed type. Unless you’re using the Pro plugin (and have an Instagram business account), you’ll be limited to the User Timeline option which will fetch posts from your profile. Make your selection and click on Next:
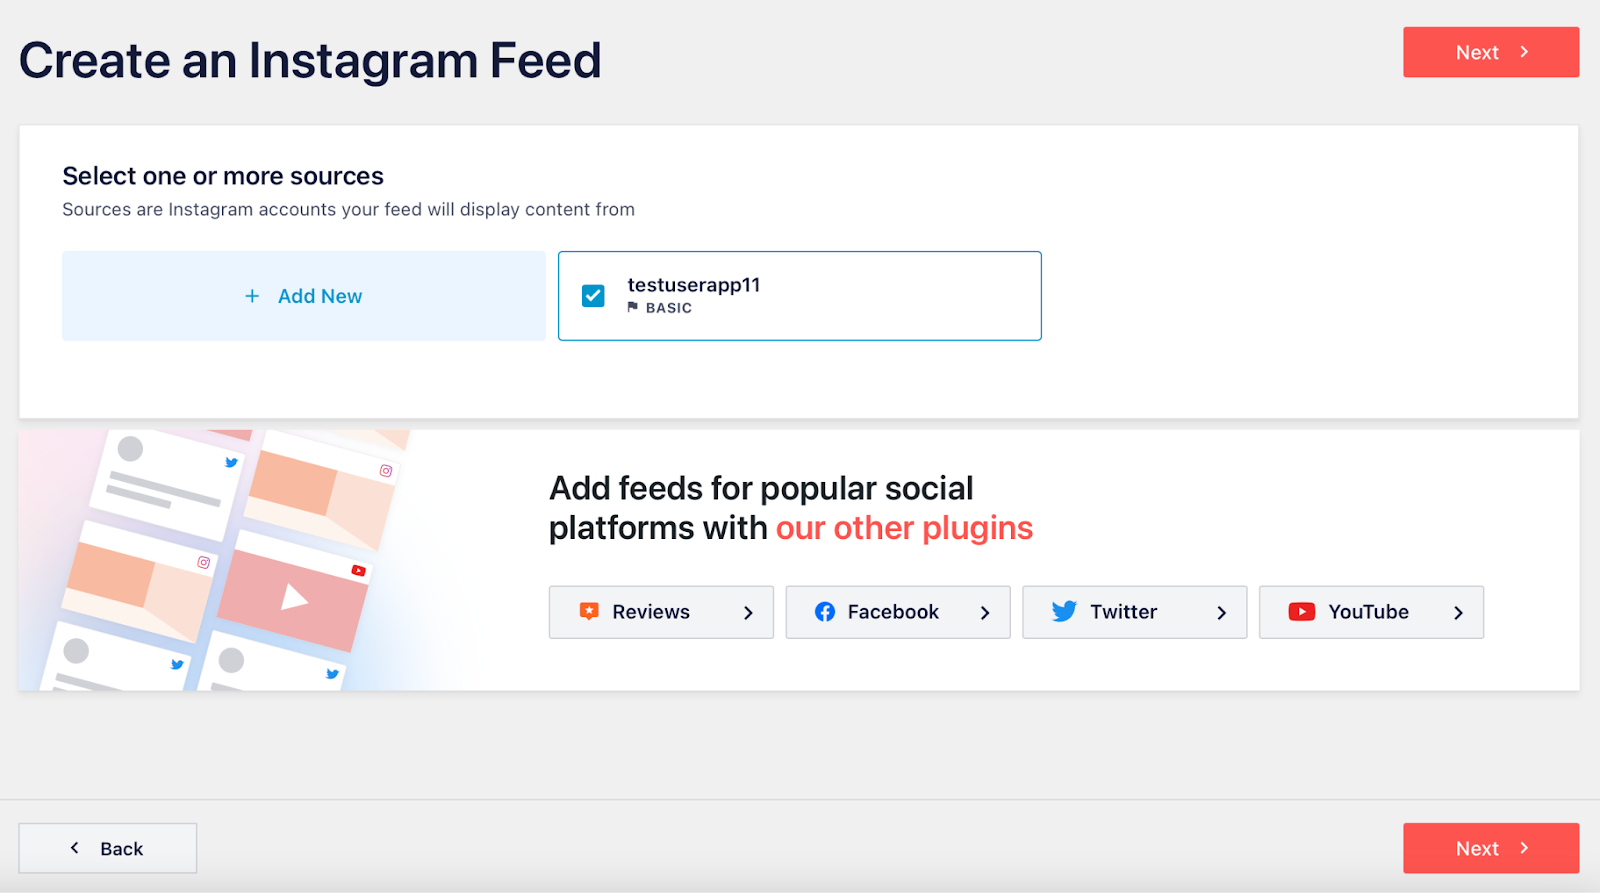
Now, you’re able to select the source (Instagram account) that you want to display content from. You should see the account that you connected to in the previous step. Or, if you skipped the section above, you’ll need to click on Add New here.
Otherwise, choose the account you want to proceed with and click on Next:
The plugin will notify you that Instagram doesn’t provide access to your profile picture or bio for personal accounts. So, you can set up a custom profile picture and bio using the plugin.
Or, if you’re not interested in this, continue to the feed editor:

If everything has gone to plan, you should be able to see your Instagram photos arranged into the default feed layout.
Step 3: Customize Your WordPress Instagram Feed
At this point, you’ve managed to create a basic WordPress Instagram feed using the Smash Balloon plugin. However, you might also want to customize the appearance of the feed so it is cohesive with your website.
For example, you may want to change the number of photos that are visible. In this case, click on the Customize tab to the left of the editor. Then, select Feed Layout:
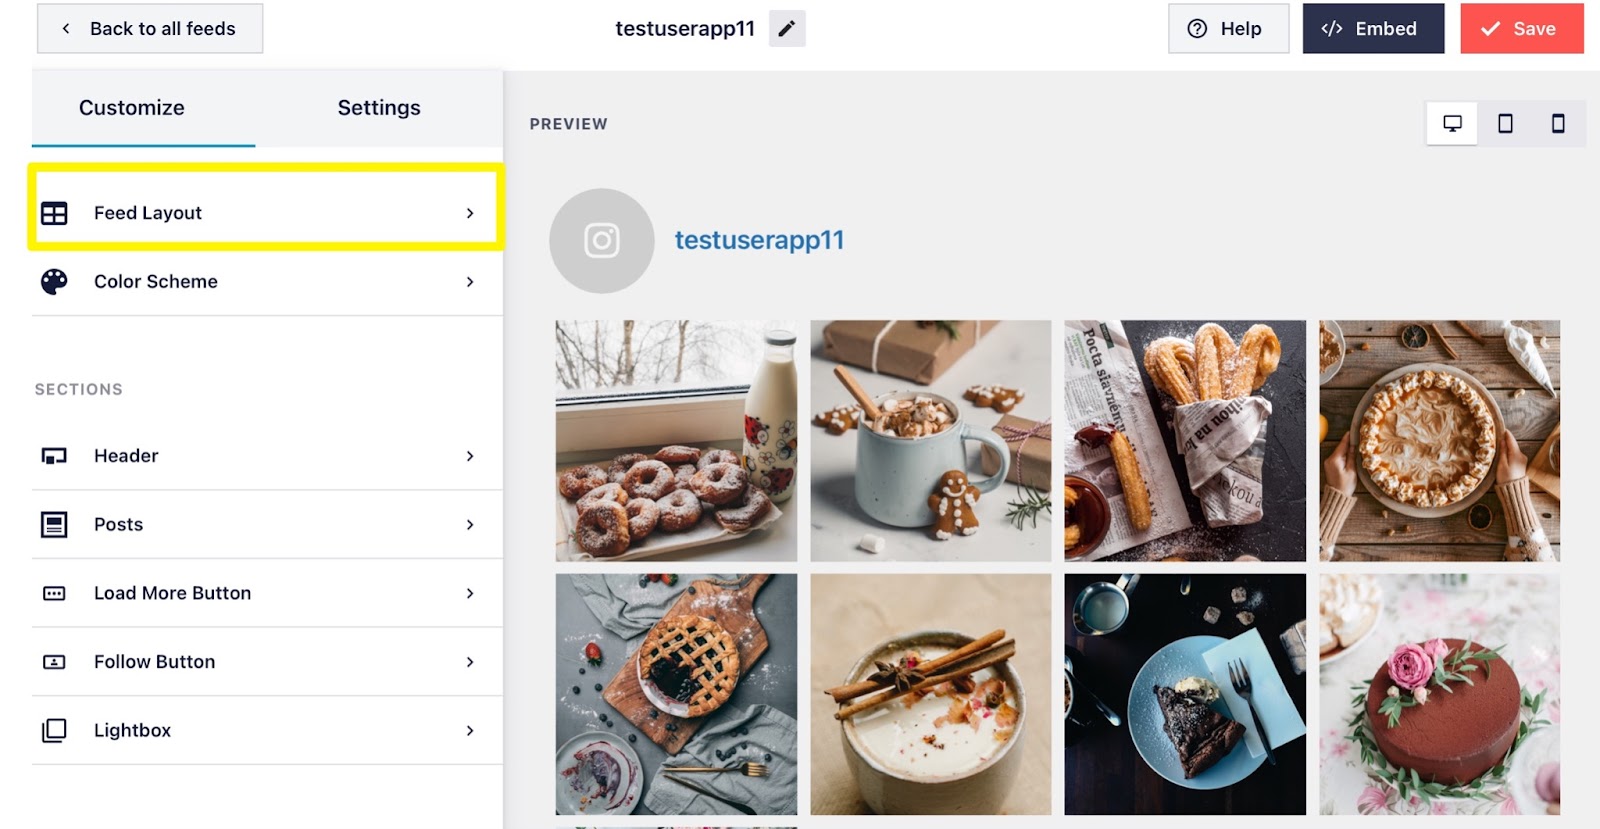
If you’re using the Pro plugin, you can change the grid layout to masonry, carousel, or highlight specific posts. Further down, you’re able to configure the number of posts and columns across desktop, tablet, and mobile devices:

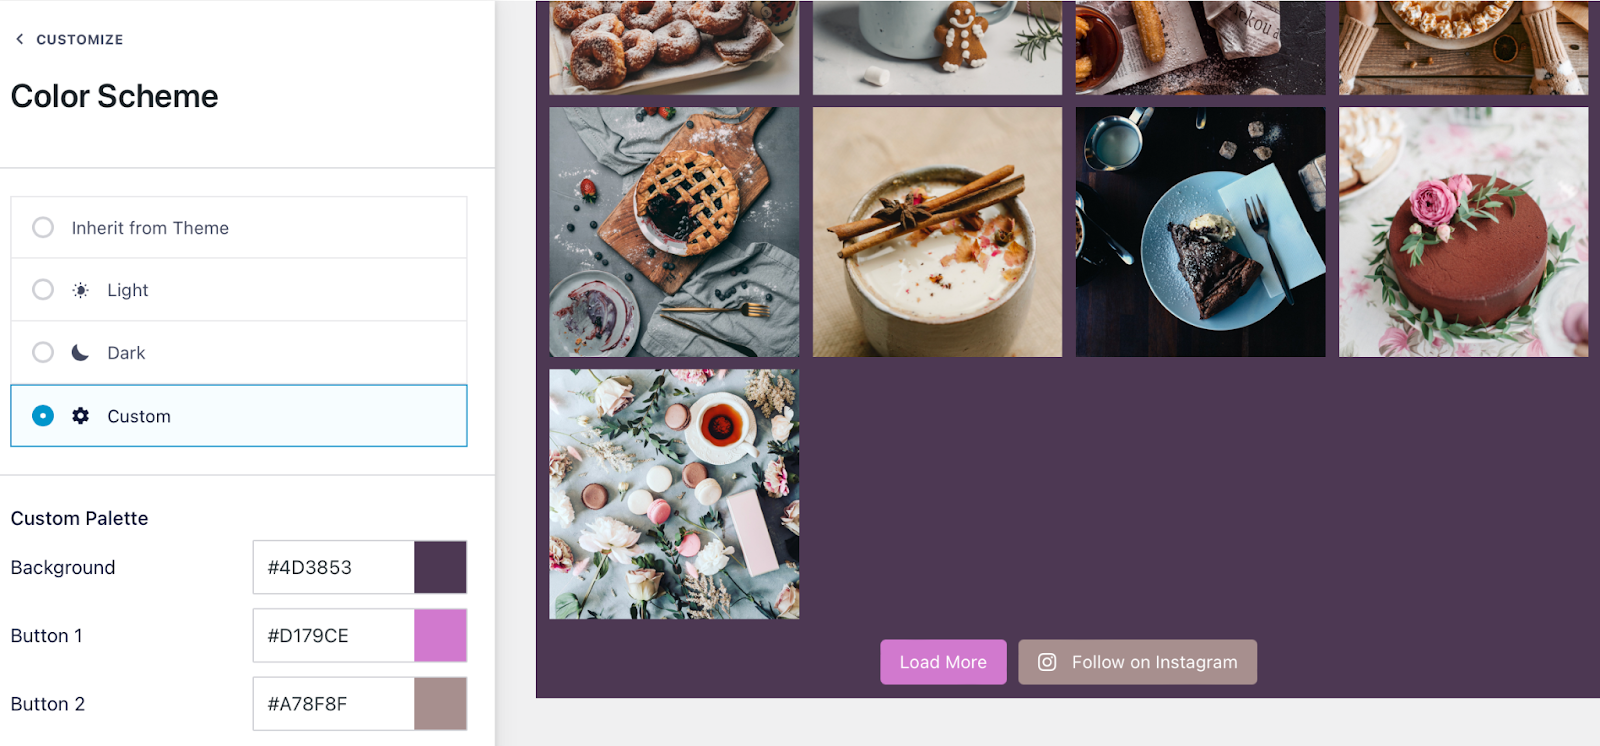
If you switch to the Color Scheme tab, you can apply light and dark options. Or, select Custom to change the colors of the buttons and background:
Meanwhile, in the Header section, you can enable/disable the Instagram header, change the text color, upload an avatar, and write a custom bio:
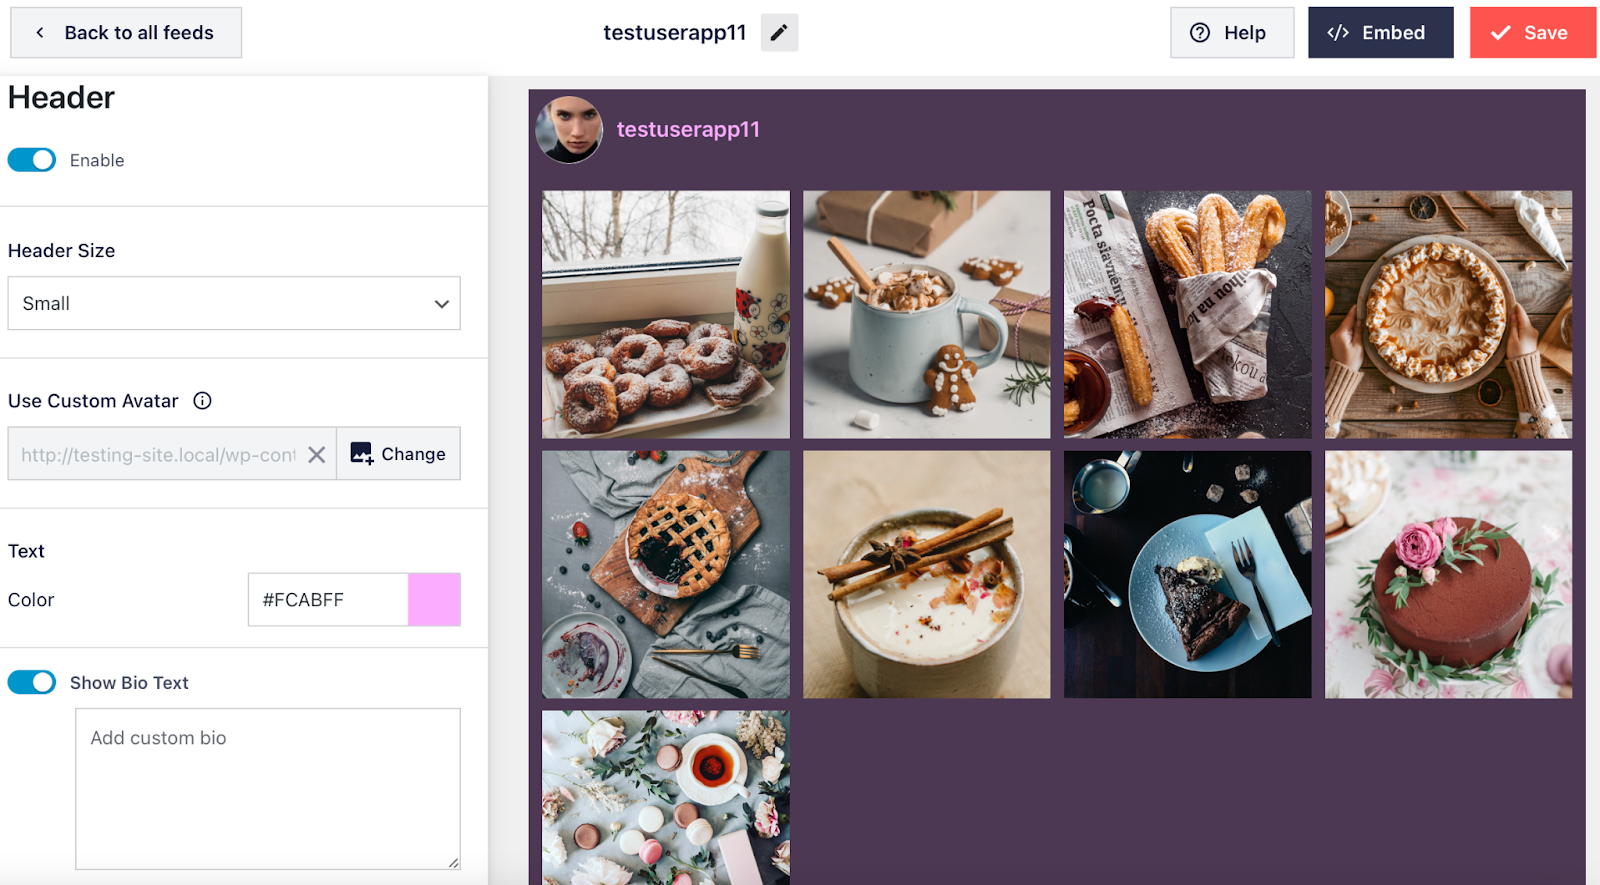
With the Pro plugin, you can choose between three header styles at the bottom of this section. Other options allow you to disable the Load More and Follow on Instagram buttons.
And, you can alter the source (change the Instagram account) and customize the order of photos in the Settings tab. For Pro users, you can also filter posts or create shoppable feeds.
Step 4: Embed the Instagram Feed in WordPress
Now that you’ve designed your custom WordPress Instagram feed, it’s time to embed it into your website. There are multiple ways to add the feed to your pages.
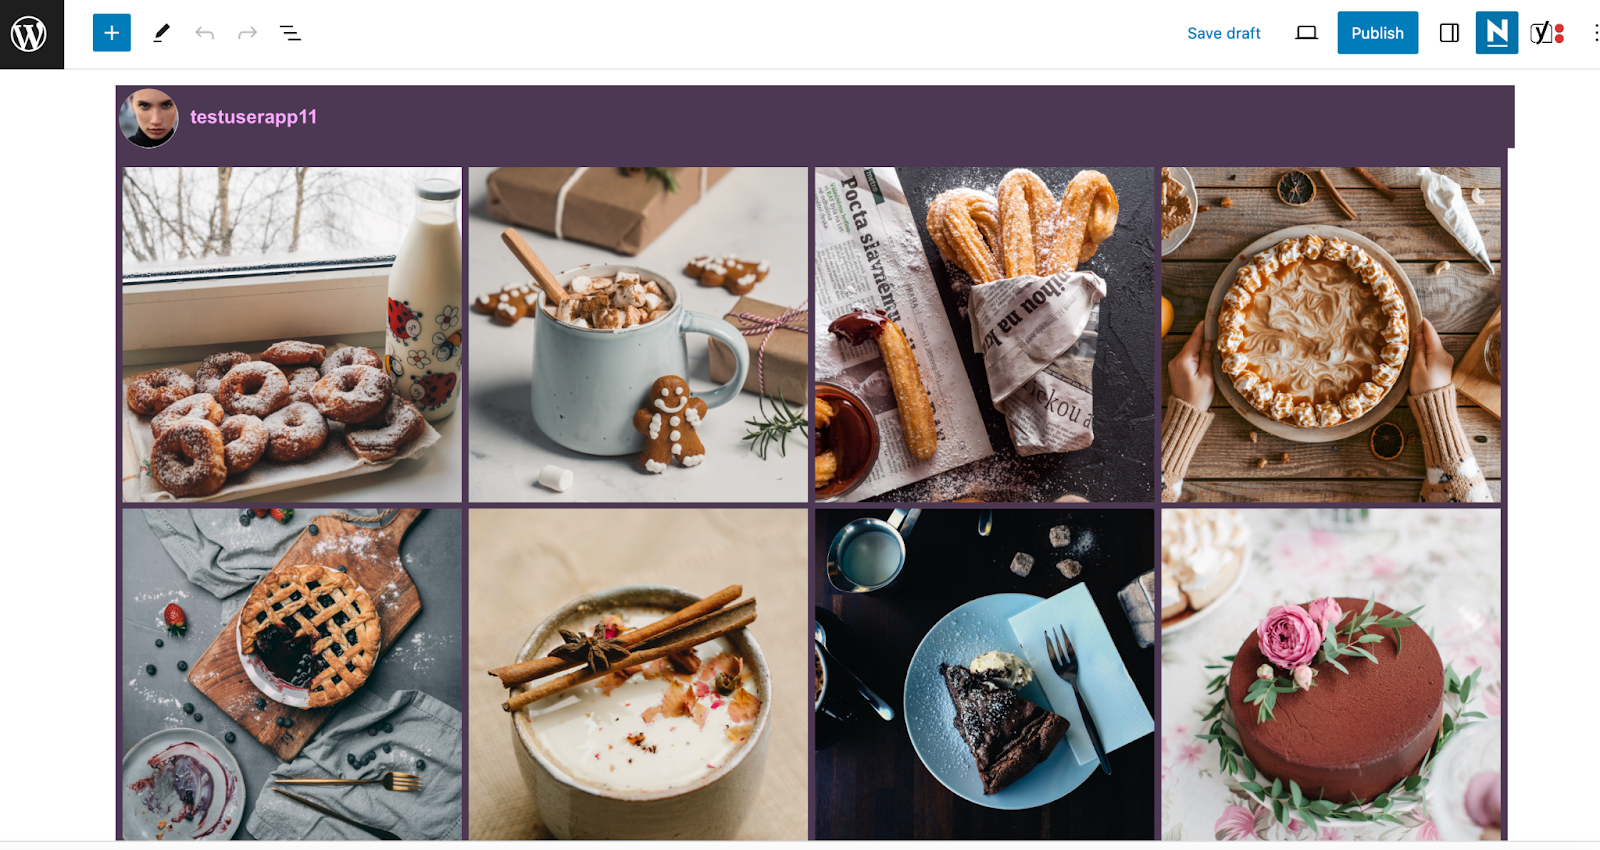
First, you can use the Instagram Feed block to insert the feed into a standard web page. All you need to do is click on the + icon to add a block and search for “Instagram Feed”:
Add the block to your page and your feed should appear automatically:
Then, either save or publish your page.
You can also embed your WordPress Instagram feed in a widget area like your header or footer. To do this, go to Appearance > Widgets in your dashboard and find the widget area where you want to include the feed.
Now, click to add a new widget and choose the Instagram Feed option. Here, preview your feed and click on Update:

Then, you can visit the front end of your site to see how the feed displays in the widget area.
Finally, you can also embed your feed using shortcode. To do this, you’ll need to head back to the Instagram Feed tab in your dashboard. Here, you’ll see a list of your feeds. Copy the shortcode beside your new feed:
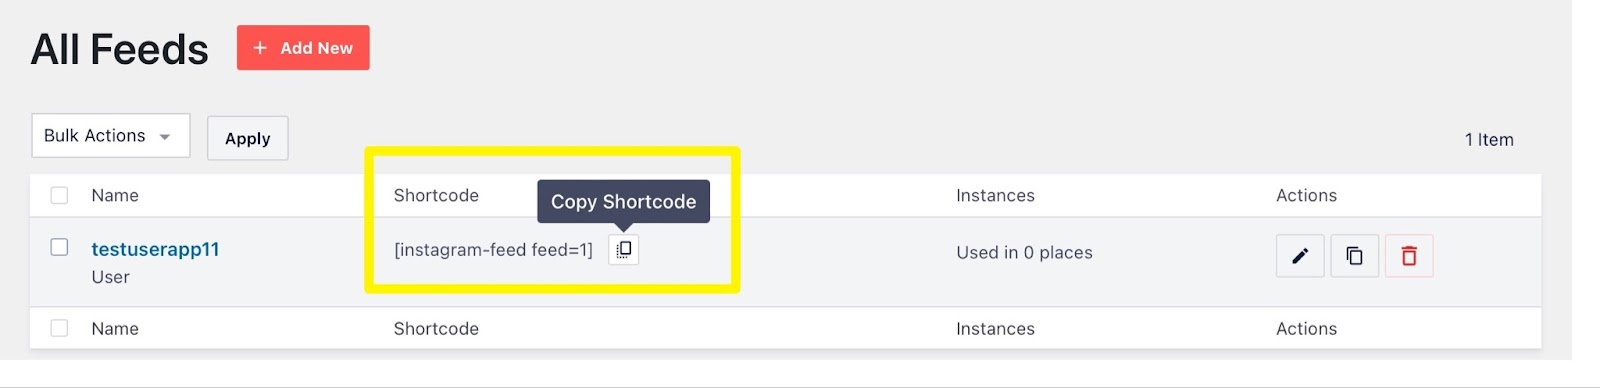
Then, you can paste the shortcode into a shortcode block on any post, page, or widget area.
Conclusion
An Instagram feed is a great way to make use of visual content on your web pages and attract more people to your social media account. The good news is it’s easy to create a WordPress Instagram feed using a handy plugin like Smash Balloon Social Photo Feed.
Do you have any questions about how to embed an Instagram feed in WordPress? Let us know in the comments section below!
Image credit: Pexels.