


With around one billion monthly active users, Instagram is one of the world’s most popular social networks. This platform provides a huge opportunity to promote your products and services, but there’s also fierce competition. As such, it’s essential to set up your Instagram advertisements properly.
In this post, we’ll discuss why you may want to advertise your business on Instagram. We’ll then show how to create a campaign that targets your ideal customers with pinpoint precision. Let’s get started!
An Introduction to Instagram Advertisements (and Why You Might Want to Run One)
By advertising your business on Instagram, you can reach thousands or even millions of new customers, which is ideal for building brand awareness. In fact, there’s evidence to suggest that 83% of Instagrammers use this popular social network to discover new products and services:

Instagram advertisements can even directly generate sales, as 46% of people admit to making a purchase after seeing a product or service on the platform. While any business can benefit from this level of exposure, Instagram is particularly popular in India and the United States. These locations boast 180 million and 170 million users respectively. If you’re targeting either of these countries, then the social network may offer even bigger rewards.
In addition, this social network is particularly popular among the 18-24 and 25-34 age demographics. If this represents your target audience, you’ll be happy to learn that over 60% of Instagram users fall into these age brackets. That’s a huge opportunity to promote your business to potential new customers.
How to Advertise Your Business on Instagram (in 4 Steps)
Now that you know why so many companies are running Instagram campaigns, it’s time to create your own. Here’s how to advertise your business on Instagram in four easy steps.
Step 1: Create a Campaign
To start, head over to Facebook Ads Manager. You can then sign in to your account and click on Create:

In the subsequent popup, choose an objective that supports Instagram as an advertising placement. For example, you might select Brand Awareness, Traffic, or Store Traffic:

As you explore the different objectives, Facebook Ads Manager will display some useful information about each category. Depending on your selection, you may need to configure some additional settings.
For example, if you opt for Catalog Sales, then Ads Manager will ask you to choose a catalog:

After making your decision, click to expand the Name your campaign section. You can now give your campaign a descriptive title:

Next, Facebook Ads Manager will ask you to create an ad set. This is the first step to targeting your audience based on characteristics such as location and age.
Targeted advertisements can often deliver higher engagement rates and conversions, so it’s a good idea to select Create ad set. Alternatively, you can open the accompanying drop-down menu, and then choose Skip ad set:

Finally, select Create ad and enter a name for your advertisement. When you’re ready to proceed, click on Continue.
Step 2: Set Your Budget
On the next screen, you may want to enable A/B testing. This setting can help ensure that your campaign, ad set, and advertisement are optimized for your chosen objective.
If you’re going to use this testing, then select Get Started:

This version of your advertisement will now be the A in your A/B testing. After publishing this ad, you can create additional versions that will serve as your variations.
You can also decide whether to enable Campaign budget optimization. This setting will use Facebook’s algorithm to determine how to spend your budget across ad sets to deliver the best results:

If you enable this setting, Facebook will ask for your campaign budget. Just be aware that when your ads have more opportunities to get results, Facebook may exceed your daily limit. If you’re ready to proceed to the next step, click on Next.
Step 3: Choose Your Target Audience and Ad Placement
Even if you’re creating a targeted ad, different content appeals to different demographics. To help maximize your conversions, Facebook can automatically generate various combinations of your creative elements.
To opt in to this feature, enable the Dynamic Creative slider:
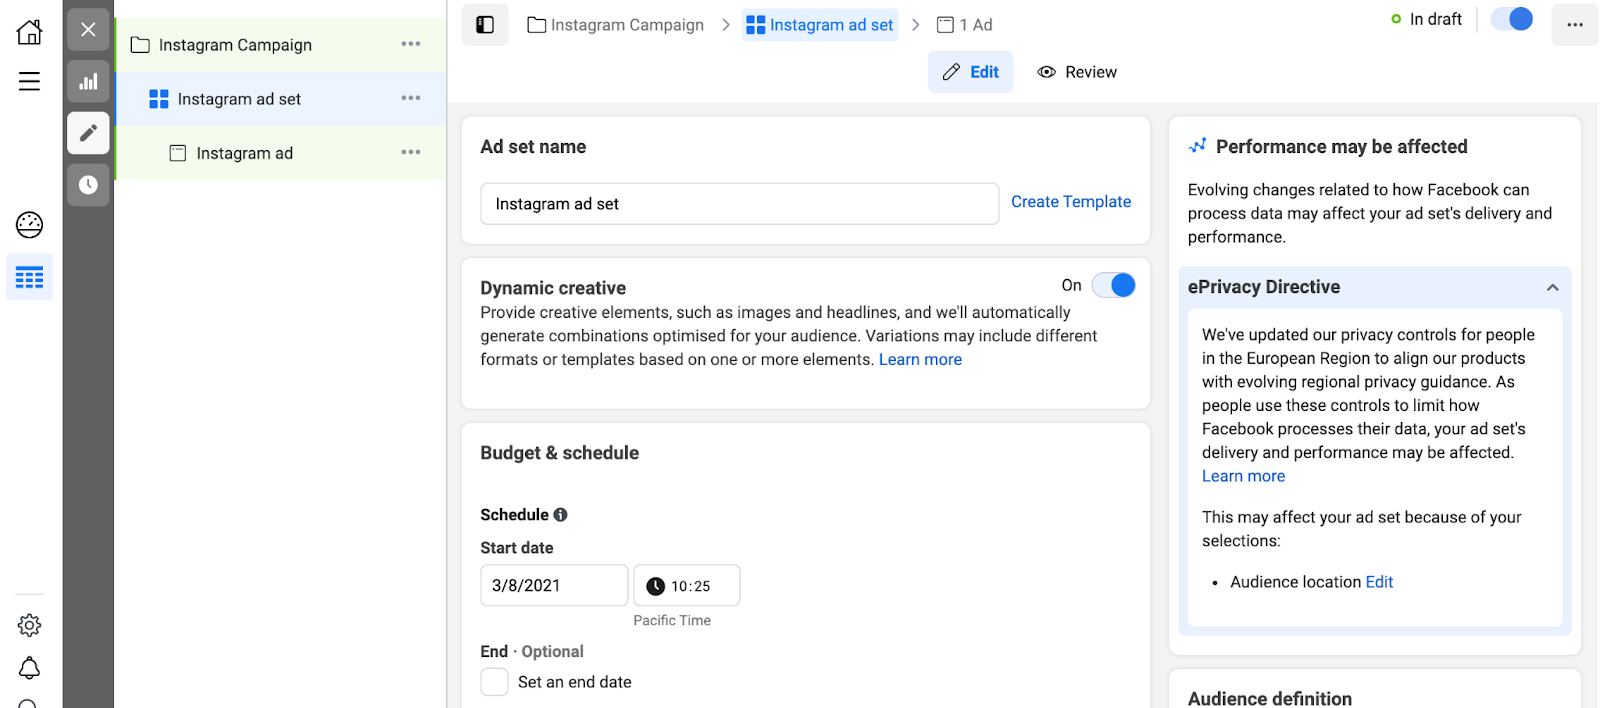
Next, you can choose a start and end date for your campaign in the Budget & schedule section. Alternatively, you can set this campaign to run indefinitely by deselecting Set an end date:

Now, scroll to the Audience section. Here, you can define who Facebook Ads Manager will target with this advertisement, using characteristics such as language, age, and even interests and behaviors:

In the Placements section, you can specify where your advertisement will appear. If you opt for Automatic Placements, Facebook will display your ad wherever it’s likely to perform best.
If you want your ad to appear on Instagram only, then you’ll need to select Manual:

You can now specify exactly where your ad should appear on Instagram. For example, you can choose from Instagram IGTV, Reels, and Stories:

As you explore each option, Facebook Ads Manager will display a preview of how your content may look. When you’re happy with these settings, click on Next.
Step 4: Design Your Advertisement
Now it’s time to create your advertisement. To start, choose the Instagram page that you want to associate with your ad:

Suppose you don’t have an Instagram page. In that case, your advertisement will use the name, profile picture, and other details from your Facebook account.
Next, scroll to the Format section. Here, you can specify whether to display your advertisement as a single image or video, scrollable media, or as a group of items that opens into a full-screen mobile experience:

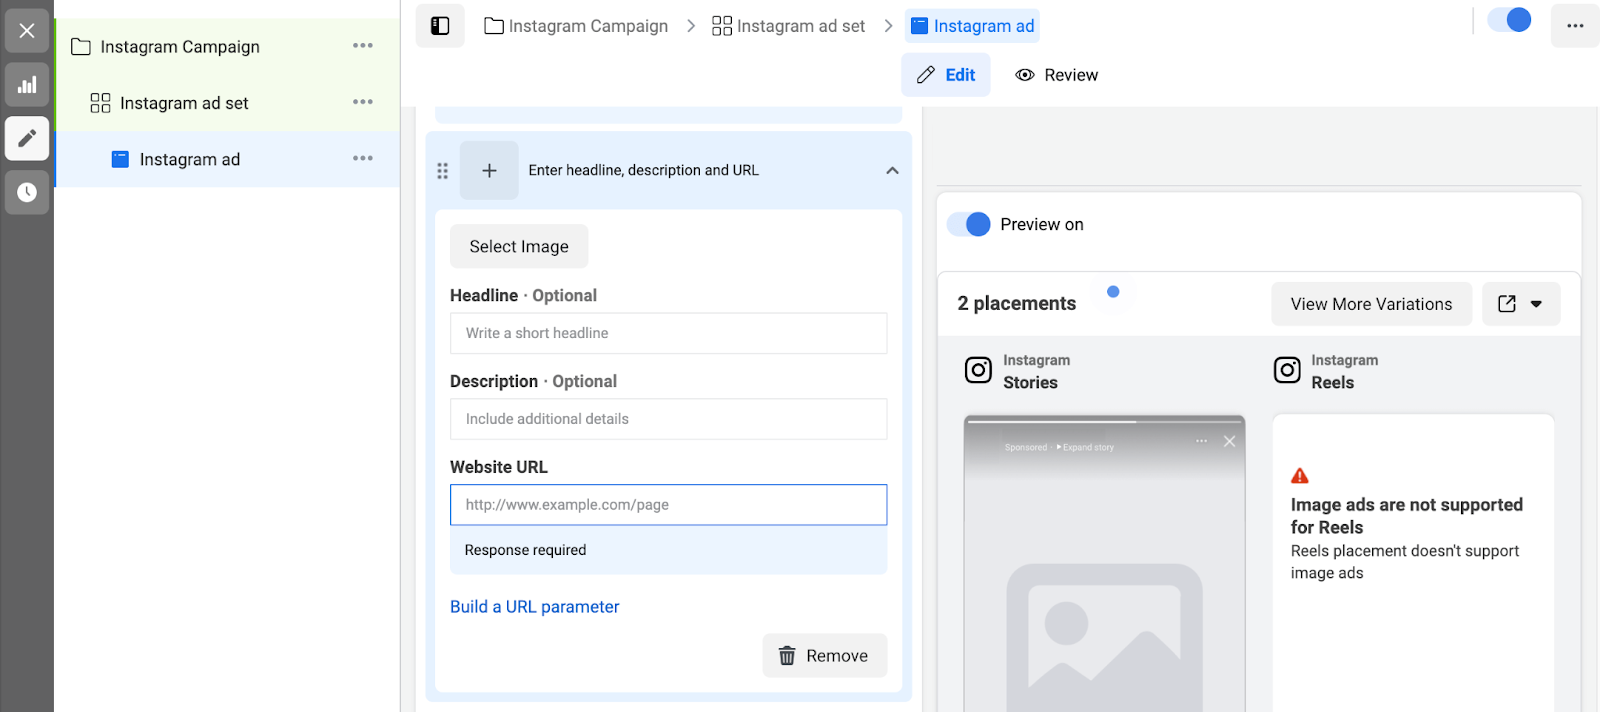
Now comes the fun part! You can scroll to the Ad creative section and craft your advertisement. This process involves adding all of the images and text that you want to include:
You can also specify the destination visitors will be forwarded to when they click on your advertisement. To help drive engagement, you may also want to add a Call To Action (CTA).
Next, you can track conversions for your campaign. This tool enables you to see which actions people perform after clicking on your Instagram ad:

You can use ad tracking data to refine your future Instagram campaigns. For example, if you’ve set up A/B testing, this information will help you identify the approach that drives the most conversions.
When you’re happy with your settings, click on Publish. Congratulations, your Instagram ad is now live!
Conclusion
Instagram is more than just a place to share beautiful photos. You could connect with hundreds or even thousands of potential new customers by advertising your business on this popular social network. Consequently, this increased reach could do wonders for your bottom line.
Do you have any questions about how to advertise your business on Instagram? Let us know in the comments section below!
Photo by Bedbible
Join the conversation