


A chatbot can add plenty of value to your online business. Among other things, it enables you to provide instant customer support, display personalized offers, and make sales directly via messages. Plus, although this might sound like a complex tool, it’s easy to implement an AI chatbot in WooCommerce with the right plugin.
In this post, we’ll take a closer look at the benefits of using an AI chatbot. Then we’ll guide you through four simple steps for adding this feature to your WooCommerce site. Let’s get started!
Why You Might Want To Use an AI Chatbot in WooCommerce
Chatbots are AI-powered virtual assistants that can help you improve your customer service. Once you install a chatbot on your WooCommerce site, it can generate full conversations with your visitors, respond to queries, provide product recommendations, and more.
A chatbot is accessible 24/7, so you can resolve customers’ problems day and night without having to hire extra support agents. Plus, you can find chatbots that are completely free, making them a low-cost solution for your customer support needs.

There are plenty of other reasons to use chatbots in WooCommerce. For instance, these AI assistants are able to make tailored recommendations based on past purchases, page views, and more.
This way, you can present the right offer to the right person at the right time, giving you a better chance of scoring conversions and sales. Plus, chatbots provide an easy way to keep track of customer data and other important metrics, so you can improve your campaigns over time.
While chatbots are primarily used for customer support purposes, however, there are many other ways to use them. For example, you may be able to make sales directly through the chatbot’s messages. In addition, if customers need to schedule appointments, you can use a chatbot to accept bookings right on your site.
How to Implement an AI Chatbot in WooCommerce (4 Steps)
Now that you know the benefits of implementing an AI chatbot in WooCommerce, here’s four simple steps to get started.
Step 1: Install and Activate AI Engine
If you want to install an AI chatbot on your WooCommerce store, the first step is to choose the right technology. There are plenty of AI plugins available, but AI Engine in particular makes an excellent choice.
With AI Engine, not only will you get access to a customizable chatbot, but you can also use the image and content generator to easily write blog posts, titles, excerpts, and more. AI Engine is also completely free, so you can install it directly within your WordPress dashboard.
To get started, simply head to Plugins > Add New. Then search for “AI Engine,” and click on Install Now > Activate:

Upon successful activation, you’ll need to enter an API key in the plugin’s settings. To generate your API key, you’ll need to go to the official OpenAI website.
Here, create a free account and then use the menu to select the View API Keys option:

Now, click on Create new secret key. You’ll need to give your API key a name. Then, copy the key and return to your WordPress dashboard.
At this point, select Meow Apps from the sidebar and click on AI Engine. Now, switch over to the Settings tab:
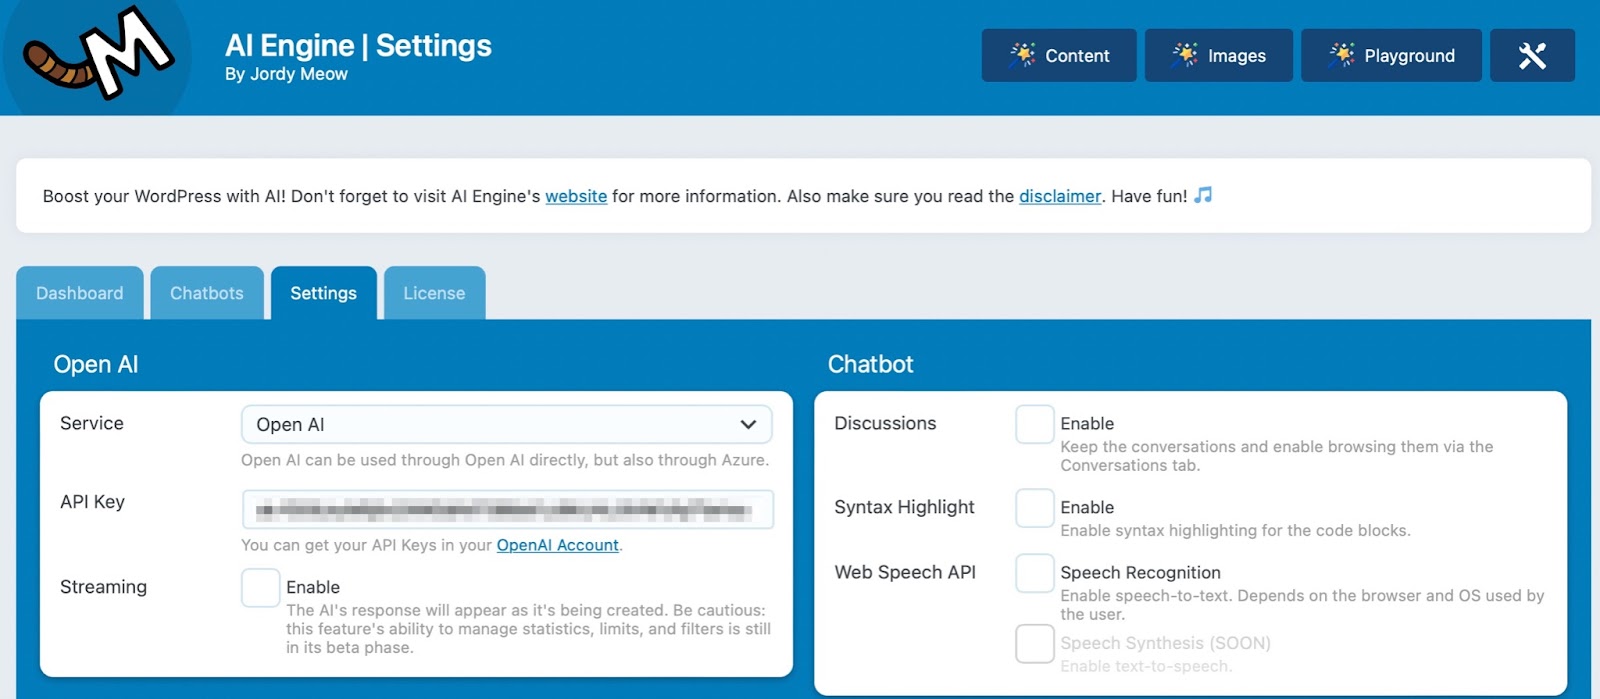
Here, paste your OpenAI key into the API Key box. Make sure that Open AI is selected as the service just above.
Step 2: Set Up Your Chatbot
Now that you’ve installed AI Engine, it’s time to set up your chatbot. One of the best parts about using this plugin is that you’re able to give your chatbot a persona that suits your brand.
This way, you can make sure your chatbot’s responses align with the rest of your website’s messaging. To train your chatbot, you’ll need to go to Meow Apps > AI Engine. Then click on Chatbots.
Within the Main Settings, make sure the Mode drop-down menu is set to Chat. Then turn your attention to the Context box:

Here, you can provide instructions so the chatbot communicates in a way that suits your business. For example, you might want the chatbot to be persuasive and knowledgeable about certain topics. Alternatively, you may prefer your AI assistant to be friendly and humorous.
Next, you can configure some other useful settings for your WooCommerce chatbot. First, you can expand the Visual Settings to define your start sentence, AI name, and placeholder text:

Plus, you can customize the messaging on the Clear and Send buttons.
Meanwhile, in the AI Settings, you can choose which AI model you want to use. And you can adjust the “temperature,” which determines the level of creativity to apply to the conversation:
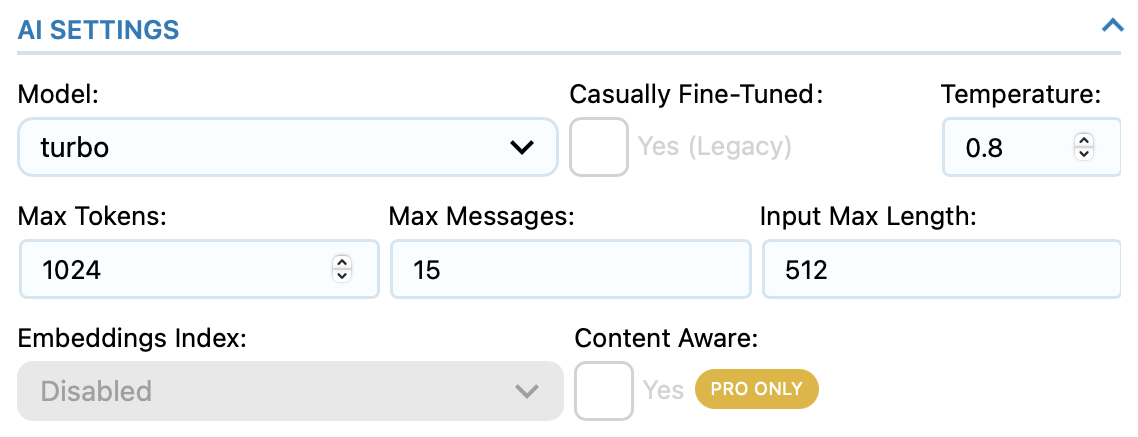
Lastly, you’re also able to determine the maximum number of tokens, messages, and characters for each message.
Step 3: Configure Your Chatbot Settings
At this point, it’s a good idea to switch over to the Settings tab to configure some additional features. Locate the Chatbot section to the right of your screen:
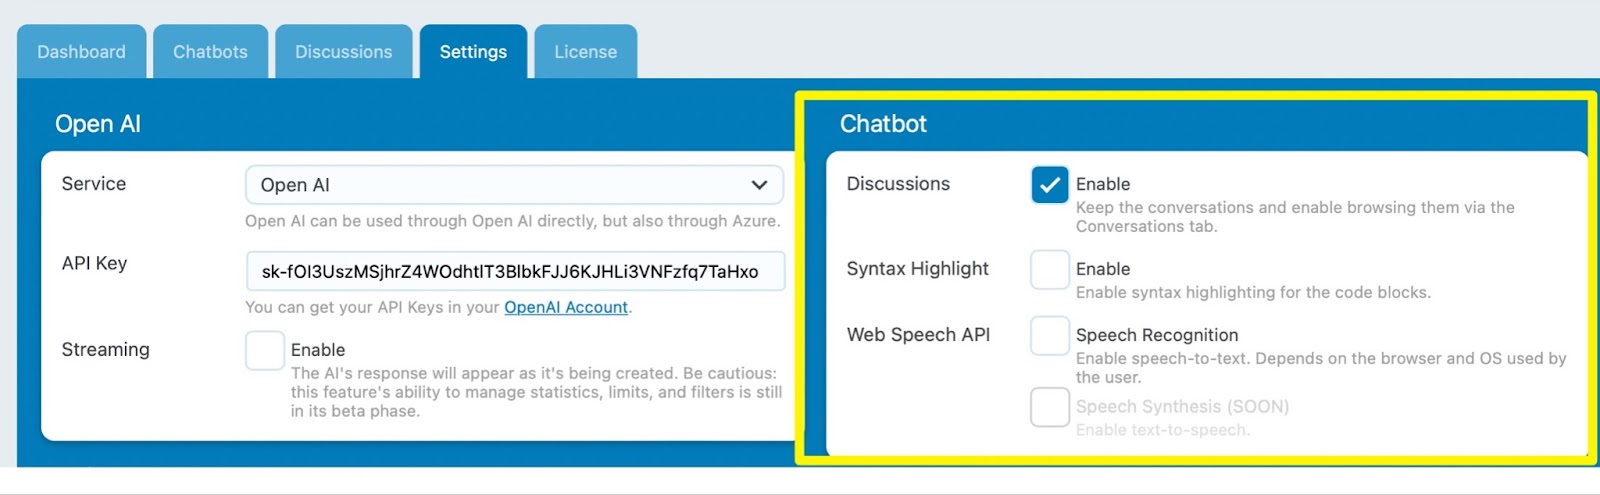
Here, you can use the checkboxes to enable discussions. This way, customers are able to converse with the AI chatbot while browsing via the Conversations tab.
You’re also able to activate Speech Recognition to make your website more accessible. However, note that this feature will only work in certain browsers and systems.
Further down, you’ll find the Admin Tools, where you can replace the default chatbot model. Meanwhile, in the Security section, you can choose to reject queries that contain banned words, and block certain IP addresses.
Step 4: Test Your Chatbot in WooCommerce
Now that you’ve got your WooCommerce chatbot all set up, you’re ready to test it on the front end of your site. To do this, it’s best to log out of WordPress and open your website in a fresh tab.
Now, locate the AI Engine icon, which you should find in the lower right corner of the screen. Here, you can interact with the chatbot to make sure the conversation reflects the personality of your brand:

You might also want to enter some banned words, to make sure your security settings are functioning properly. Plus, you can make sure the buttons, placeholder text, and start sentence are exactly as you want them.
Conclusion
AI chatbots offer an easy (and free) way to improve your WooCommerce site. With the right tool, you can customize messages and give your chatbot a unique persona. This way, you can ensure that your chatbot responds to customer queries in a way that reflects your brand and messaging.
Do you have any questions about how to implement an AI chatbot for WooCommerce sites? Let us know in the comments below!
Image by Mohamed Hassan
Join the conversation